Thursday, 29 October 2015

Fruit Leather Snacks

When I was little I used to love going to the health food store with my mum on Saturday mornings. They used to sell these little fruit leather snacks and we used to go with the intention of stocking up for the week's lunch boxes. They rarely made it to when we got home, let alone through the week for our packed lunches. I decided to experiment the other day as I had a load of apples left (they were on offer and I couldn't resist buying 3 kilos of them!) so made up a big batch of apple compote. I put the oven on as low as it could go, spread it over a square silicone cake mould and hoped for the best. This was the result! 


Ingredients

4 apples
1 tsp cinnamon 
100ml water

Method

1. Peel, core and chop the apples into small chunks (around 1cm).
2. Put into a saucepan over a low heat with the cinnamon and water and simmer gently until the apples are soft and starting to go mushy.
3. Using a hand blender, mush the apples until they're blended and resemble a smooth sauce.
4. Cool the sauce and spread over a silicone baking sheet. You need something square or rectangular thats shallow to be able to spread it thinly. You want to get it as smooth as possible and only about 1 or 2 mm thick. Thin and smooth is all that matters.
5. Bake for about 6 hours on the lowest setting on your oven. If you leave it in too long you'll end up with an apple crisp rather than soft leather strips. 
6. Leave to cool then cut into strips with scissors. 

Tips

- Try using other fruit in with the apple such as strawberries or pears.
- Roll them up into little rolls to make them fun for kids to eat. 
- Use a cookie cutter to cut them into shapes for kids. 
- Try making some applesauce with no cinnamon. Take out a small amount of the cooled sauce and add the cinnamon to that. Pipe it in diagonal lines across the spread out apple sauce on the tray to give a stripy effect. Bake as normal and you'll have stripy fruit leather! You could also make a cinnamon free apple sauce and pipe the lines in a strawberry compote to make it multicoloured and stripy. Play around with it! It's so simple and is inevitably delicious so even if it doesn't look like it'd win any beauty pageants, it'll sure taste delicious! 

Enjoy! 

Healthy Banana and Oat Cookies

I love cookies. Who doesn't? I'm trying to cut down on processed foods though, as I'm getting more and more conscious about what I eat. These cookies are super simple. I've played around with different variations on the recipe too. The first ones I made were these cranberry ones. Simply oats, banana and cranberries. Easy huh? I was going to add some orange zest but didn't have any oranges and a walk to the shop in the rain didn't sound too appealing. The second ones I made are chocolate ones. Healthy chocolate cookies! I use raw cacao in my baking instead of cocoa powder. It gives a really rich chocolatey flavour and you don't need to use much at all. It's a bit pricey but I buy in bulk and using it means I can eat more chocolatey bakes without the guilt. It's high in antioxidants and is good for your heart and stuff (I googled it once and was sold but if you want a proper list of why it's good, go ahead and have a look online). 

Ingredients
2 bananas
200g oats
25g cranberries
Zest of 1 orange

Method
1. Peel the bananas and mash them in a bowl.
2. Stir in the oats, cranberries and zest.
3. Roll into 20 small balls and flatten onto baking trays into cookies
4. Bake at 180 degrees for 15-20 minutes until they're golden and firm to the touch.
5. Cool on a wire rack and eat!


Variations

Chocolate and Date Cookies
- Add 25g raw cacao and 25g chopped dates to the mixture.

Chocolate Orange Cookies
- Add 25g raw cacao and the zest of an orange to the mixture.

White Chocolate and Cranberry Cookies
- Add 25g white chocolate chips and 25g cranberries to the mixture.


Tips

You can basically add anything you want to these cookies. With my recipes they work out at around 50-55 calories each. Obviously adding chunks of chocolate will increase that but they're still better for you than normal cookies and are low in saturated fat and sugar. I don't feel guilty polishing half a batch of these in one go! They're fab for breakfast on the go or snacks during the day. I even took a load to the cinema with me to avoid the temptation of popcorn and pick and mix! 


Tuesday, 6 May 2014

Simple Genoese Sponge

While deciding what sponge to use as the base of a birthday cake, I did a bit of experimentation. I've never made a Genoese sponge before so decided to give it a go. Overall it was quite simple and the cake was light and really spongy. It's not dense enough to support the weight of the fondant I'd need to cover it with for my birthday cake but it makes a really nice light sponge for making a cake for afternoon tea or something. I topped it with lemon curd and fresh blueberries but you really could use anything. There's only one of the two layers in the photos because half of it was eaten warm from the oven with Nutella and custard. That's less sophisticated but so so tasty! 


Ingredients
50g melted, cooled butter
120g plain flour
Pinch salt
4 eggs (if you can, use duck eggs or substitute one in for a hens egg)
120g caster sugar 

Method
1. With a little of the melted butter, grease two sandwich tins.
2. In a bowl over hot water, whisk the eggs and sugar with an electric whisk for about 10 minutes until thick, pale and creamy and at least tripled in size.

3. Remove from the heat and fold in the flour in two batches, followed by the butter. 

4. Divide between the two tins and bake for 20-30 minutes at 170 degrees Celsius until golden and a skewer inserted into the middle comes out clean. 

To finish top with lemon curd and fresh blueberries and then dust with icing sugar. I did take a picture but it seems to have vanished from my phone while all the rest have stayed... mystery! It's really versatile so you really could top it with whatever you wanted. My brother wanted a Nutella one so instead of having two layers of sponge I had one of the cakes topped with lemon curd and blueberries and the other with Nutella and fresh strawberries. Give it a go! 

Tips
-Use a much bigger bowl than you think you need for the eggs and sugar- you'll be surprised how much the mixture expands! 
-Don't be impatient with the whisking - it'll go really thick and creamy and leave a trail when you pull the beaters out of the mixture. 

Almond, Berry and Seed Breakfast Muffins

I saw a recipe somewhere for muffins like these but decided to tweak them a bit. They taste really good and they're way better for you than the muffins you buy from Starbucks on days when you're running too late for breakfast. I made a full batch of 12 then froze some so that when I needed to take one with me I just took it out of the freezer and by the time I got hungry it had thawed out. They keep for a couple of days in an airtight box anyway as they're full of fruit. They're so simple to make and even trick you into thinking you're eating real cake! They also only take 30 mins start to finish and 25 of those are when they're in the oven!

Ingredients
1 cup self-raising flour
1 pot (about 280 ml) buttermilk
1 cup ground almonds
2/3rds cup caster sugar (or muscavado unrefined sugar if you have it)
3tbsp seeds (I used half chia seeds and half flax seeds, Amazon sells them cheap)
1 large egg
1/4 cup olive oil
1 cup berries (I use frozen mixed berries) 
1 tsp cinnamon
1/2 tsp nutmeg

Method
1. Put all the dry ingredients in a bowl.
2. Mix the oil, buttermilk and egg in a jug.
3. Add the wet to the dry ingredients and mix until incorporated.
4. Fold through the berries.
5. Divide between 12 muffin cases in a cupcake pan.
6. Bake at 170 degrees Celsius for about 25 minutes until a skewer comes out clean when inserted.
7. Leave to cool on a wire rack. 


Tips
- I topped mine with a sprinkling of porridge oats before baking to give some extra crunch to the top
- Use wholemeal flour if you want them to be even healthier
- Try mixing it up with different fruits and seeds as they're really versatile! Pumpkin seeds and apricots would be amazing... you could even add some white choc chips if you wanted them to be a little bit naughty!! 

Happy baking :) 

Salted Caramel and Peanut Millionaires Shortbread

I love millionaires shortbread but find it too sweet. This is a great way of making it less sickly. However, it does mean that you can eat more of it and are entering dangerous territory if trying to embark on a diet! I used salted peanuts in this recipe instead of salting the caramel to add constrast so that there's parts that are really salty and parts that are really sweet from the caramel. I like it that way but by all means just salt the caramel and leave out the nuts.

Ingredients
75g caster sugar
115g butter
200g plain flour (or 175g plus 1tbsp corn flour)
1 pinch salt

Caramel:
100g butter
100g light muscavado sugar
1 tin consensed milk 

150g dark chocolate

Method
1. Mix the butter and caster sugar until combined and resembling breadcrumbs. 
2. Add in the flour and press into a 20cm tin.
3. Bake at 150 degrees Celsius for about 30 minutes until golden. 

4. For the caramel, melt the butter and muscavado sugar together over a low heat. 
5. When combined, add the condensed milk, bring to the boil and stir continuously until the caramel is thick and coats the back of the spoon. As a test, dip in a cold teaspoon and if the caramel firms up and sets very quickly, it's good to go.
6. Pour the caramel over the biscuit and allow to firm up and cool.
7. When cool, top with the melted dark chocolate and allow to set. 


Tips
Make the caramel really thick. Be patient with it as it'll get there, it may just take a while. You should be able to drag your spoon from one side of the pan to the other and the line you've just drawn on the bottom of the pan to be still visible. This'll allow for an easily sliced caramel rather than having it too gooey and messy when trying to divide it up.
Cut through the chocolate when it's slightly soft so just before it sets otherwise it'll crack and you won't get uniform little squares. If it's set hard, dip your knife in hot water and divide up the chocolate first before cutting all the way through the shortbread. 
Try adding nuts to the base if you don't want to add them to the caramel (use unsalted though) for extra crunch but keeping the smooth caramel. 

Wednesday, 8 January 2014

Salted Caramel and Chocolate Profiteroles

Today is my aunt's birthday. We went out for lunch to a place that she'd been to before and said they did amazing profiteroles. When we went to order dessert, they'd sold out! She wasn't too happy about this so I came home and decided to give them a bash. I'd never made profiteroles before and the first attempt today failed as I didn't have enough flour, decided to wing it and found out the hard way that choux pastry can't be done in the haphazard way I usually bake. This actually requires measuring and careful following of the recipe. If you do that, it's actually really easy (not on the biceps though! You'd have guns like a superhero if you did it every day) and doesn't take too long. A relaxing afternoon bake for a rainy day!
 
 
Ingredients
120g plain flour
Pinch of salt
200ml cold water
75g butter
1 tbsp caster sugar
4 eggs, beaten
 
Method
1. Preheat the oven to 200 degrees Celsius.
2. Put the water, sugar and butter in a pan over a low  heat until the butter is melted.
3. Turn up the heat to a boil then once boiling, turn off the heat and tip in the flour and salt.
4. Beat like your life depends on it until its a smooth paste which comes away from the sides of the pan in a ball.
5. Leave the dough to cool a bit.
6. When it's cooled a bit, beat in a little of the egg at a time. You'll need about 4 but stop when it's a smooth, glossy, pipeable paste. Don't keep adding to use it up as you'll get a mixture that's too runny and doesn't hold its shape in the oven.
7. Scoop into a piping bag with a round nozzle (or a food bag with the corner snipped off if like me you don't have a piping bag and nozzle to hand just accept the fact that you won't get symmetrical, perfect little choux buns).
8. Pipe into little balls in rows on baking trays lined with parchment and stuck down with tiny blobs of the mixture. This is the kind of consistency you want to end up with after the eggs are beaten in.
9. Dip your finger in cold water and flatten any 'nipples' on them before baking them.
10. Bake for about 30 minutes until risen and golden. They expand a LOT!
11. Stab each one's bottom with a skewer to release some air and put them back into the oven, hole side up for 5 minutes.
12. Allow to cool completely on a wire tray.
 
Tips
Don't pipe them too close together as they expand a lot when cooked! I didn't realise just how much they grew!
Put a pan of water in the bottom of the oven to create more steam and give them extra puffiness.
Pipe in single squeezes. Don't go back to a blob and add more to it to make it bigger as it won't rise up in a ball shape and you'll get odd-looking random shaped balls.
Don't open the oven while they're cooking as they'll deflate.
Cook them until they're a dark gold. If they're underdone when you open the oven they'll deflate so be patient and let them go slightly darker than you think you should.
Make sure they're filled with cream! If you don't squeeze hard enough you'll get a measly amount coming out of your bag into them and that's no use to anyone... load them up! They should feel heavy compared to the unfilled ones.
 
I filled mine with a big pot of cream (about 600ml I think), whipped up with the zest of an orange. You just pipe it into the buns when they're completely cool (you do need a small nozzle for this though).
 
For the chocolate sauce, I melted 200g dark chocolate in a bain marie (heatproof bowl over simmering water) and added in half a tub of double cream (about 150ml). I just mixed it until smooth and dunked the filled profiteroles into it. If you weren't adding caramel sauce too, some Cointreau would be good so you could have chocolate orange ones. Or even melt in a chocolate orange instead of the dark chocolate which would make it reeeeally yummy.
 
I drizzled over some of the sauce I'd made for the chocolate and chestnut pavlova as I still had some of that left. I just added some sea salt to it to give it a hint of saltiness to cut through the sweetness. To make it I melted100g caster sugar with 4 tbsp water together then brought it to a boil. Don't stir the mixture or the sugar will crystallize. When it was a dark caramel colour, I removed it from the heat and whisked in a tablespoon of butter and 300ml of double cream. It bubbles up and sizzles but just keep mixing and you'll get your delicious sauce in no time. Add in salt to taste and then store the extra (if there's any left) in sterilized jars.
 
They're not that difficult to make and considering this was my first ever attempt at choux pastry, I don't think they turned out too bad! They taste so good that any minor aesthetic imperfections are instantly forgiven by the lucky people that get to chow down on them!!


Blueberry Buttermilk Pancakes

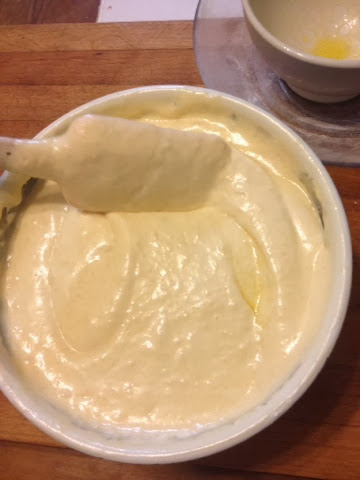
I made these for breakfast for my mum when we went on a weekend away to West Wales. I had to wing it as I didn't have scales or a whisk but if they turned out as well as they did despite that, then having the right tools will only increase the chances of this being an idiot-proof recipe! They're really simple and taste really good. I serve them in a big fat stack with lots of maple syrup. They're best eaten straight out of the pan but I've also microwaved them after they've cooled when I'm ready for round two!
 
Ingredients
1 punnet blueberries
5 heaped tablespoons plain flour
1 pinch salt
1 egg
1 pot of buttermilk (about 254ml I think)
2 tbsp melted butter
1 tsp salt
1 tsp bicarb
 
Method
1. Mix the dry ingredients together in a bowl.
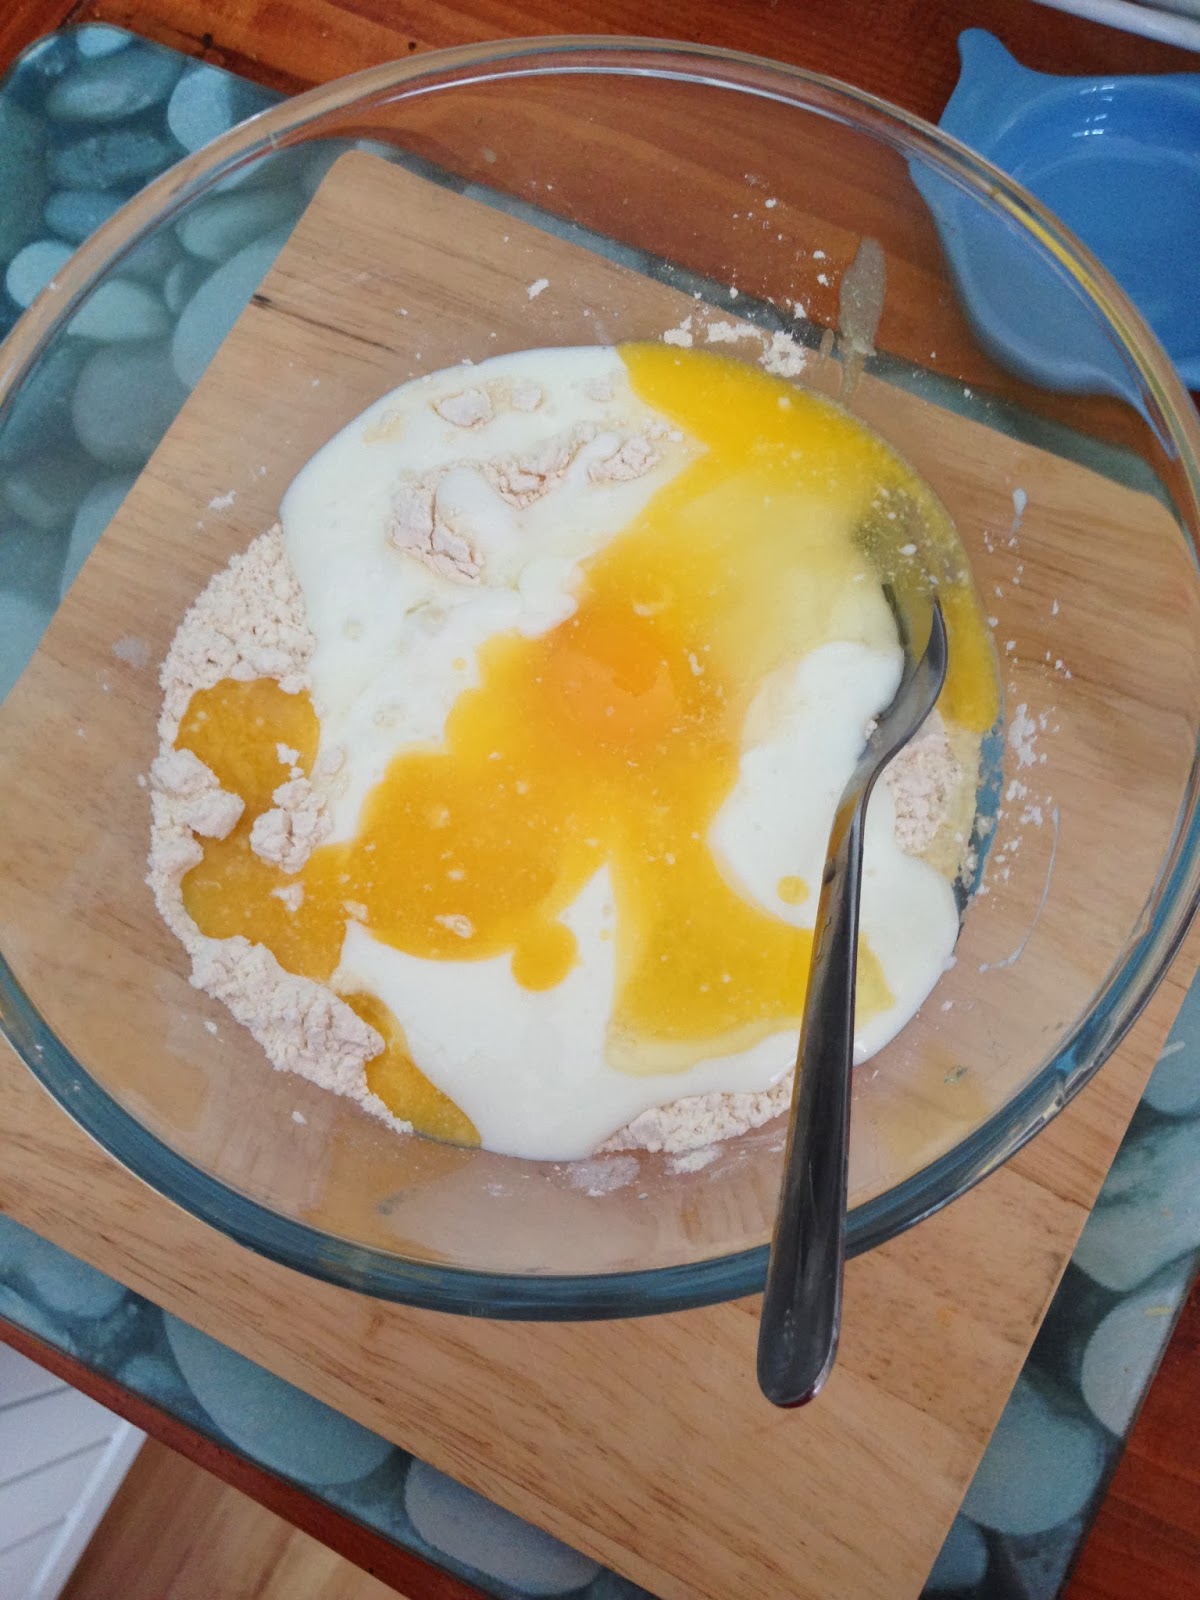
2. In a jug or small bowl, stir the wet ingredients together with a fork.
3. Add the wet to the dry ingredients and mix until combined.
4. Over a low heat, dollop in tablespoons of the mixture. Top each blob of batter with some blueberries.
5. When the tops of the pancakes bubble, flip them over.
6. Eat hot with lots of maple syrup!
 

Tips
Don't have your pan too hot as the outsides will cook really fast and you'll have raw dough in the middle. They're fine to take their time over a low heat. If you do happen to have them undercooked, blast them in the microwave for 30 seconds and they'll be cooked throughout.


Rosewater Turkish Delight

I guess this is like the sweet version of Marmite. I happen to love Turkish Delight, everyone else in my house hates it. My aunty only likes the ones that aren't covered in chocolate and considering I'd never made it, I decided to give it a go for her Christmas present as I love giving homemade gifts. It was a real success overall! It's also not as hard as you might think....
 
This is the recipe I used. I'll link it straight up as I didn't tweak it at all and it's simple enough to follow. I haven't tried it with lemon but I'm definitely going to. I also want to try it with orange and pistachio as I think that'd be really nice.
 
Here are the photos of the process of making it.
I'm not sure if I boiled it too vigorously as it seemed to be really airy and formed a crispy film over the top when I poured it out. Once I'd dusted the cubes with sugar it didn't really matter but it really bothered me (insignificant a flaw as it may seem to others) so I'm determined to find out why and remedy it before I make more!

It's reeeeeeeeally sticky so getting it out of the dish and into the little cubes is a nightmare. I don't think cling film would work as the mix is soooo hot when you pour it out I don't think cling film would stand a chance. You could try greaseproof or foil but they'd leave ridges in the final product and I'm far too much of a perfectionist for that to be okay!
It's sticky and feels like it doesn't want to come out, but get a palette knife and show it who's boss!! I started in a corner and just worked my way through the tray in rows. It's resilient stuff so don't be afraid to be a bit rough with it to get it out. It'll ping back to it's little cube :)

I hadn't made it before and there don't seem to be many recipes out there, not ones as simple as this anyway. I hope that it helps knowing where I went wrong!
It's really not as hard or labour-intensive as you think and if you're a fan of rosewater definitely give it a go! If everyone else hates it, look on the bright side... more for you!!


Coconut and Lime Rice Pudding

This is a super simple recipe but always seems to go down well. I make it with coconut milk instead of milk and really you can just leave it to bubble away itself with the occasional stir. I usually make it with pudding rice but have also done it with risotto rice as I saw someone on TV use Arborio rice with rice pudding and that worked well too.
 
Ingredients
1 cup pudding or risotto rice
Zest of 1 lime
1 tin coconut milk
1 tsp vanilla bean paste
3 tbsp caster sugar (or to taste)
 
Method
1. Put everything into a heavy-based saucepan except for the sugar. Slowly bring to the boil.
2. Stir occasionally until the rice has absorbed all of the milk and is tender. If the liquid is absorbed before the rice is cooked, add a little milk to the pan.
3. When the rice is cooked, stir through the caster sugar and serve. Simple eh?!
 
Tips
Shake the can of coconut milk before opening it as it often separates.
Use low-fat coconut milk if you don't want to use the normal stuff - I only ever use the reduced fat one.
You don't need much sugar at all! The coconut adds a lot of flavour and sweetness to the rice.
Add some orange zest too if you want to add more flavour or some chopped dried apricots as they get really puffed up and juicy. Also, topping with some toasted coconut and serving with fresh fruit makes it more of a dessert and less of a comfort food. There's no judgement if you eat it straight out of the pan though!!


Chocolate and Chestnut Meringue

I made this instead of traditional Christmas desserts this year. I know it can be considered blasphemous but I don't really care. I'm not a massive fan of raisins so Christmas cake and pudding really do nothing for me. I'd never tried chestnuts before and Waitrose had tins of chestnut puree on offer so I decided to get one and try something with it. I think they're an acquired taste despite not being too flavourful and overpowering but with the addition of chocolate went down very well indeed!

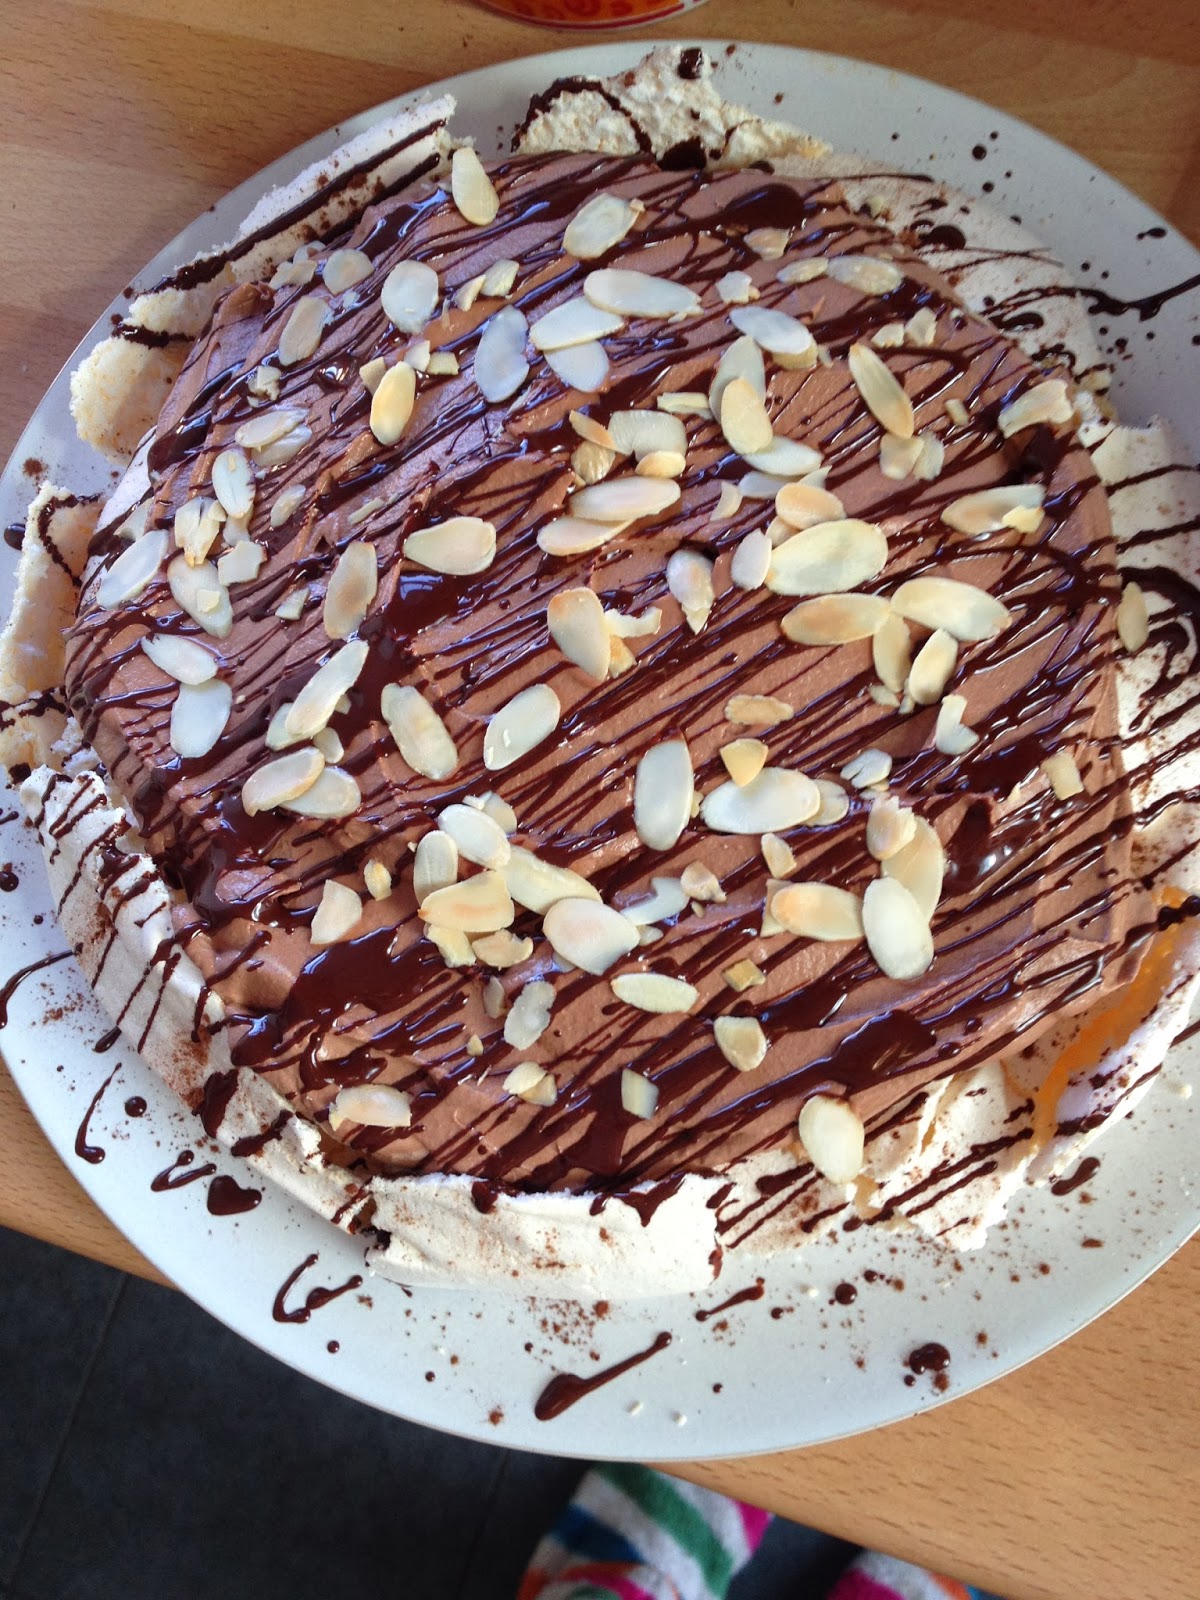
This is the finished result. Not bad for a bit of experimentation eh?! It's a simple meringue base with a chocolate and chestnut cream, topped with toasted almonds and drizzled with chocolate. I can't remember exact quantities as to be honest, I didn't measure anything! It was all just a bit of judgement and chucking a few things together and seeing what happened.
 
Ingredients
6 egg whites
350g caster sugar
Pinch of salt
 
1/2 tin chestnut puree
Large tub of double cream
Icing sugar to taste (a few tbsp)
200g good quality dark chocolate
100g good quality milk chocolate
Small handful toasted flaked almonds
 
Method
1. Start by whisking the egg whites in an electric mixer with a pinch of salt. When they form soft peaks, add in the sugar a tablespoon at a time with the mixer running. When you have a firm, glossy meringue, stop mixing.
2. Spread the meringue out in a large circle on some baking paper. I did this freehand and just got it as circular as I could but if you're not too good at it draw around a plate on the reverse of the baking paper to give you a guide.
3. Bake at 140 degrees Celsius for 45 mins to an hour until firm and then turn the oven down to about 80 and leave it in there for about another hour to cook through. I didn't make it so it was hard all the way through as I like a really soft meringue. It's really up to you how long you cook it for if you want it firm or gooey and fluffy.
 
Leave the meringue to cool completely in the oven with the door shut. I made mine the day before and just left it in the oven overnight.
 
For the chocolate and chestnut cream, whip the cream with an electric mixer until soft peaks are formed. You don't want it too firm as you'll find it difficult to mix everything together and it won't be as soft. The chocolate will firm up the mix when it sets anyway so don't worry about it being soft. You want the cream to hold its shape but without being stiff.
When the cream is softly whipped, fold in the chestnut puree. I did this in two batches to fold it in without knocking too much air out.
Melt the chocolate in a bowl over a pan of simmering water. You want to leave it to cool slightly before mixing it through the cream.
When slightly cooled, fold in most of the chocolate, leaving some in the bowl to drizzle on top later.
Taste the cream and add sifted cing sugar to taste if it needs it. Remember the meringue will be sweet so don't overdo the sugar!
Spread the cream over the cooled meringue, top with the almonds and drizzle with the remaining chocolate.


Tips
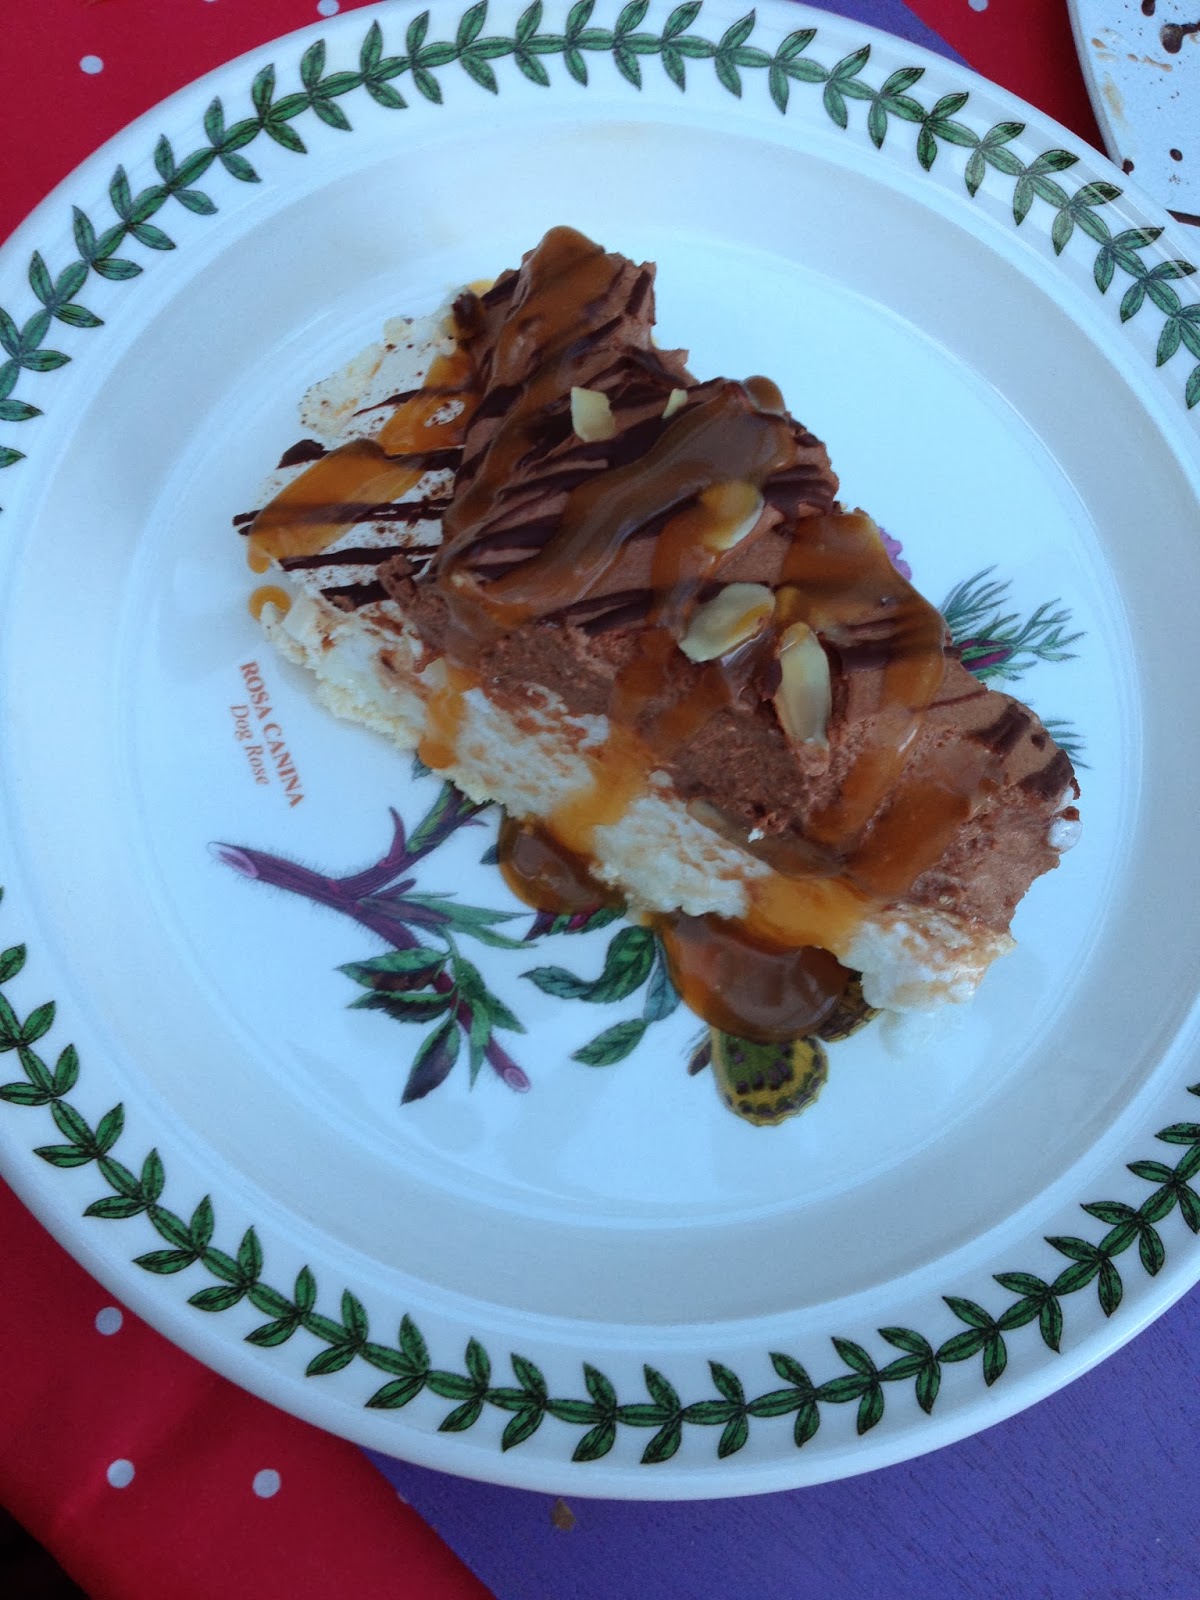
I served it with a salted butterscotch sauce which went really well considering I didn't add icing sugar to the cream. It really offset the bitterness of the chocolate. Everyone else seemed to enjoy the 'darkness' of the chocolate but I found it a bit too overpowering so added some milk chocolate to the recipe too.
Make the meringue a day ahead and leave airtight to save time. It makes it a really quick, simple dessert to assemble if all you have to do is make the chestnut cream!
Dust the meringue with cocoa powder if you want to decorate it a bit before you add the chocolate cream. If you couldn't tell before I tend to overdo the chocolate content...
Toast the almonds in a dry pan over a low heat. It's really easy to burn them so keep an eye on them!
Stick the baking paper to the tray with blobs of the meringue.. it stops the paper flying up and sticking to the meringue if you have a powerful fan!


Monday, 5 August 2013

Simple Homemade Pizza

I never usually make my own pizza bases but after seeing Buddy from Cake Boss (on his Kitchen Boss show) make them, I decided to give them a go. I've done them before with a packet of base mix but decided it was lazy and unnecessary if the ingredients in the dough were so simple anyway. It's really easy to make and it does take a longish time but most of that time is spent on the dough proving so the actual effort is minimal.


Ingredients - Pizza Bases
3 1/4 cups plain flour
3/4 tsp dried yeast
1 1/2 tsp salt
2 tbsp olive oil
1 1/3 cups warm water

Method
1. Put the ingredients into a mixing bowl (place the yeast and salt at opposite sides of the bowl) and mix with a dough hook until a dough is formed. 

2. Knead the dough until it is elastic and smooth (it can be done in the mixer but you can over-knead it so unless you watch it carefully do it by hand as you can't overdo it and it's good stress relief!). 
3. Place the dough into an oiled bowl and cover with cling film or a tea towel. Leave to prove for about an hour until doubled in size. 

While the dough is proving, make the tomato sauce. Using a tube of tomato puree is super simple but this tastes so much better and really doesn't require much more time!

Ingredients
1 tin of tomatoes
2 cloves garlic
2 pinches salt
1 tsp sugar
1/2 cup grated parmesan
lots of black pepper

Method
1. Put ingredients in a food processor and blend until smooth. Simple eh?!

When the dough has doubled in size, take it out of the bowl and knead it again. Divide it up into three balls and place on a floured baking tray. Leave to prove again for another hour.

Once the dough has proved again, roll out into about 10" bases. Place on baking sheets and leave for about 10 minutes to rise again slightly.

Ladle over the tomato sauce and top with mozzarella and whatever other toppings you want. I made one with goats cheese, red onion, black olives and spinach and one with just mozzarella, fresh spinach and some herbs. 
Bake at 260 degrees Celsius for 7-10 minutes depending on how thick your base is.  

Tips
Use any toppings you want - prosciutto and mushroom is really tasty too!
You can put fresh spinach on before cooking and it wont burn onto the pizza.
Lots of mixed herbs make it really tasty!
Make all three up instead of dividing the recipe and freeze the pizza to have at a later date.
Use proper mozzarella cheese, not cheddar!!

Simple Strawberry Cheesecake

This recipe came about as a result of a bit of late night experimentation when I had a craving for cheesecake. I didn't want a really heavy one so used fat-free Greek yoghurt and light Philadelphia cream cheese. I've made it since without the biscuit base and for some reason I can justify eating a lot more of it to myself as the base is where the 'bad' things are. It's not really heavy like other cheesecakes and I'm sure it's MUCH lighter on the calories and fat too so I consider it semi-healthy (not that I need much persuasion for a good cheesecake!!). I added a load of strawberries to it but if you wanted to add something else instead or leave it as a plain vanilla one it'd work just as well. This recipe makes around enough for a standard sandwich tin sized cheesecake (about 12cm I think). I had to improvise and use a bigger rectangular one as my baking stuff is packed in the attic of the new house I've moved into and I was too lazy to go and dig it out. If you have too much mixture just put it into a ramekin and bake by itself.
I find the Greek yoghurt makes the cheesecake really creamy but stops it from being too heavy. It's such a simple and quick recipe and requires minimal effort. 


Ingredients
200g digestive biscuits, crushed
50g melted butter
200g fat free yoghurt
200g light cream cheese
2 eggs
4-6 tbsp icing sugar (to taste)
1 tsp vanilla extract
1/2 punnet chopped strawberries (optional)

Method
1. Preheat the oven to 140 degrees Celsius.
2. Mix the butter and biscuits together and press into a tin (I had to improvise as I didn't have the usual sandwich sized tin so used a bigger rectangular one which made a bigger but thinner base). Bake for 5 minutes.

3. Mix the rest of the ingredients in a bowl. Be careful not to overmix it. 


4. Add the cream cheese mixture to the top of the biscuit base and bake for 25 minutes at 120 degrees Celsius until firm on top but with a slight wobble.
5. Remove from the oven and leave to cool.

Tips
- It works really well with raspberries and white chocolate chunks!
- It tastes better cold. I was really impatient and tried to eat some before it was cool and despite still being good, it was much better after I'd waited for it to cool down.