Showing posts with label chocolate. Show all posts

Wednesday, 8 January 2014

Salted Caramel and Chocolate Profiteroles

Today is my aunt's birthday. We went out for lunch to a place that she'd been to before and said they did amazing profiteroles. When we went to order dessert, they'd sold out! She wasn't too happy about this so I came home and decided to give them a bash. I'd never made profiteroles before and the first attempt today failed as I didn't have enough flour, decided to wing it and found out the hard way that choux pastry can't be done in the haphazard way I usually bake. This actually requires measuring and careful following of the recipe. If you do that, it's actually really easy (not on the biceps though! You'd have guns like a superhero if you did it every day) and doesn't take too long. A relaxing afternoon bake for a rainy day!
 
 
Ingredients
120g plain flour
Pinch of salt
200ml cold water
75g butter
1 tbsp caster sugar
4 eggs, beaten
 
Method
1. Preheat the oven to 200 degrees Celsius.
2. Put the water, sugar and butter in a pan over a low  heat until the butter is melted.
3. Turn up the heat to a boil then once boiling, turn off the heat and tip in the flour and salt.
4. Beat like your life depends on it until its a smooth paste which comes away from the sides of the pan in a ball.
5. Leave the dough to cool a bit.
6. When it's cooled a bit, beat in a little of the egg at a time. You'll need about 4 but stop when it's a smooth, glossy, pipeable paste. Don't keep adding to use it up as you'll get a mixture that's too runny and doesn't hold its shape in the oven.
7. Scoop into a piping bag with a round nozzle (or a food bag with the corner snipped off if like me you don't have a piping bag and nozzle to hand just accept the fact that you won't get symmetrical, perfect little choux buns).
8. Pipe into little balls in rows on baking trays lined with parchment and stuck down with tiny blobs of the mixture. This is the kind of consistency you want to end up with after the eggs are beaten in.
9. Dip your finger in cold water and flatten any 'nipples' on them before baking them.
10. Bake for about 30 minutes until risen and golden. They expand a LOT!
11. Stab each one's bottom with a skewer to release some air and put them back into the oven, hole side up for 5 minutes.
12. Allow to cool completely on a wire tray.
 
Tips
Don't pipe them too close together as they expand a lot when cooked! I didn't realise just how much they grew!
Put a pan of water in the bottom of the oven to create more steam and give them extra puffiness.
Pipe in single squeezes. Don't go back to a blob and add more to it to make it bigger as it won't rise up in a ball shape and you'll get odd-looking random shaped balls.
Don't open the oven while they're cooking as they'll deflate.
Cook them until they're a dark gold. If they're underdone when you open the oven they'll deflate so be patient and let them go slightly darker than you think you should.
Make sure they're filled with cream! If you don't squeeze hard enough you'll get a measly amount coming out of your bag into them and that's no use to anyone... load them up! They should feel heavy compared to the unfilled ones.
 
I filled mine with a big pot of cream (about 600ml I think), whipped up with the zest of an orange. You just pipe it into the buns when they're completely cool (you do need a small nozzle for this though).
 
For the chocolate sauce, I melted 200g dark chocolate in a bain marie (heatproof bowl over simmering water) and added in half a tub of double cream (about 150ml). I just mixed it until smooth and dunked the filled profiteroles into it. If you weren't adding caramel sauce too, some Cointreau would be good so you could have chocolate orange ones. Or even melt in a chocolate orange instead of the dark chocolate which would make it reeeeally yummy.
 
I drizzled over some of the sauce I'd made for the chocolate and chestnut pavlova as I still had some of that left. I just added some sea salt to it to give it a hint of saltiness to cut through the sweetness. To make it I melted100g caster sugar with 4 tbsp water together then brought it to a boil. Don't stir the mixture or the sugar will crystallize. When it was a dark caramel colour, I removed it from the heat and whisked in a tablespoon of butter and 300ml of double cream. It bubbles up and sizzles but just keep mixing and you'll get your delicious sauce in no time. Add in salt to taste and then store the extra (if there's any left) in sterilized jars.
 
They're not that difficult to make and considering this was my first ever attempt at choux pastry, I don't think they turned out too bad! They taste so good that any minor aesthetic imperfections are instantly forgiven by the lucky people that get to chow down on them!!


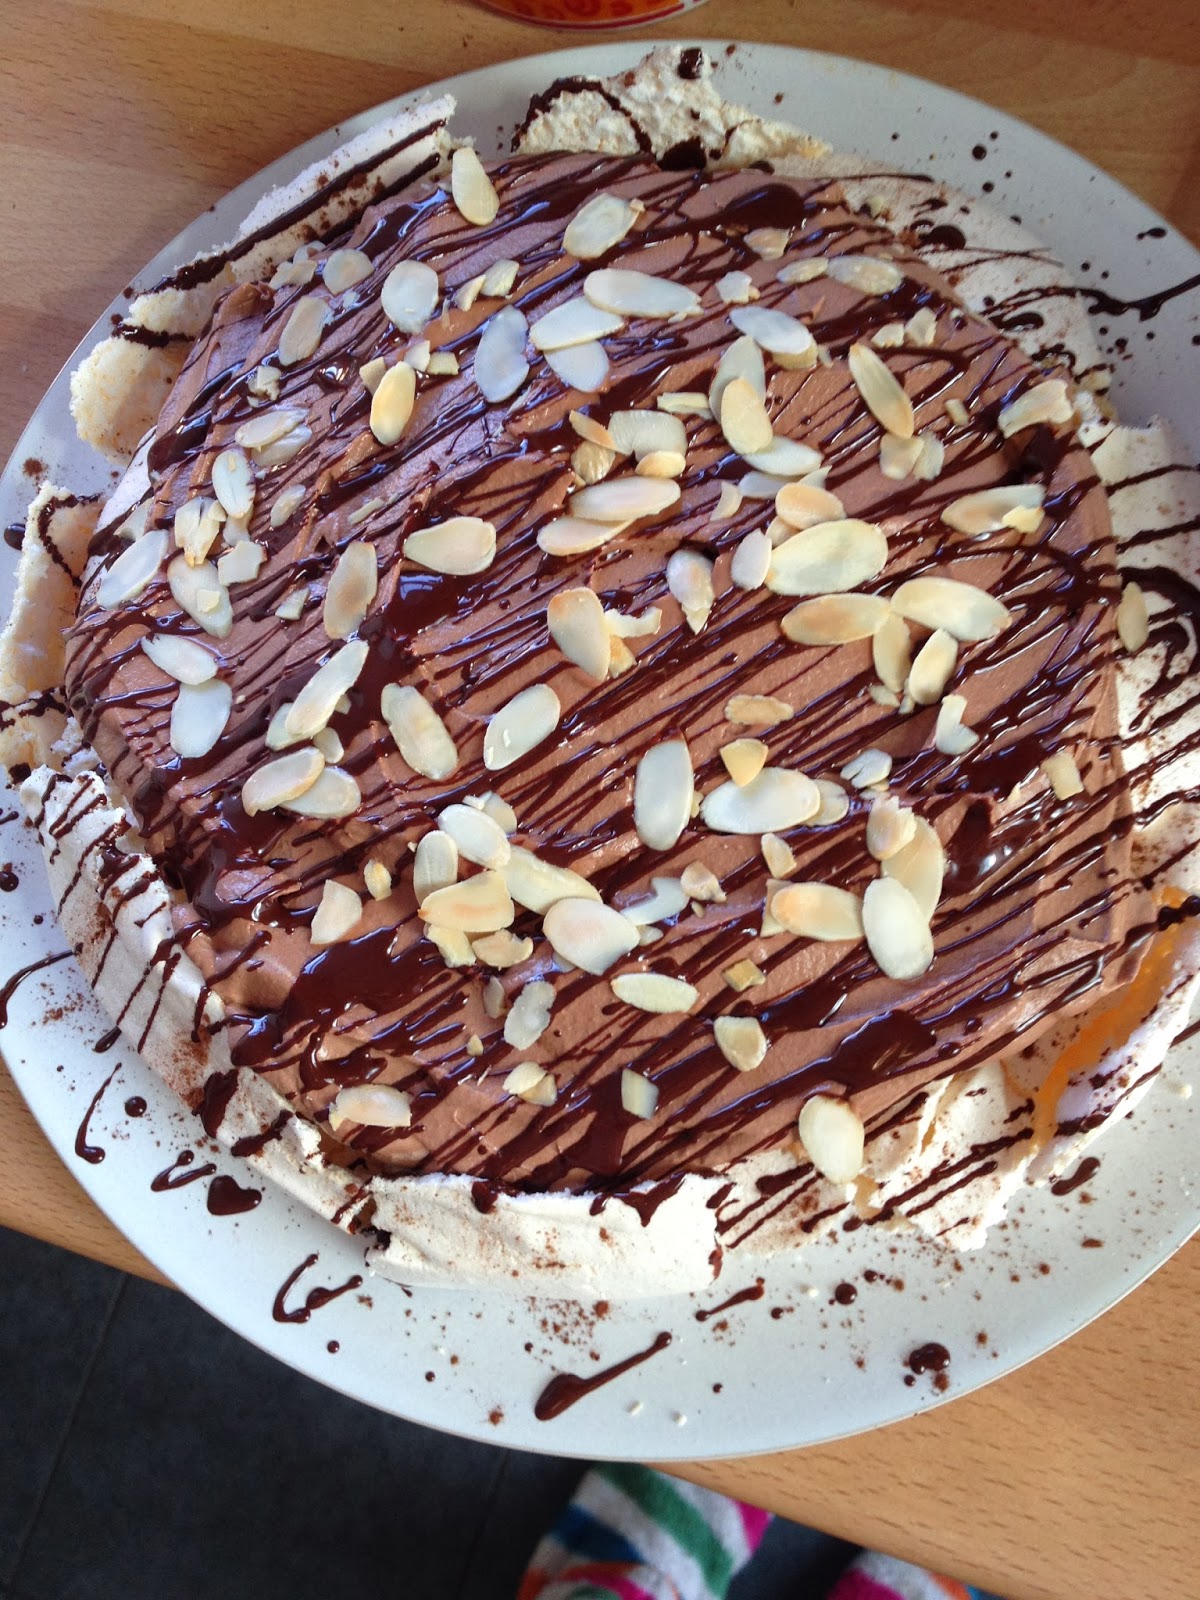
Chocolate and Chestnut Meringue

I made this instead of traditional Christmas desserts this year. I know it can be considered blasphemous but I don't really care. I'm not a massive fan of raisins so Christmas cake and pudding really do nothing for me. I'd never tried chestnuts before and Waitrose had tins of chestnut puree on offer so I decided to get one and try something with it. I think they're an acquired taste despite not being too flavourful and overpowering but with the addition of chocolate went down very well indeed!

This is the finished result. Not bad for a bit of experimentation eh?! It's a simple meringue base with a chocolate and chestnut cream, topped with toasted almonds and drizzled with chocolate. I can't remember exact quantities as to be honest, I didn't measure anything! It was all just a bit of judgement and chucking a few things together and seeing what happened.
 
Ingredients
6 egg whites
350g caster sugar
Pinch of salt
 
1/2 tin chestnut puree
Large tub of double cream
Icing sugar to taste (a few tbsp)
200g good quality dark chocolate
100g good quality milk chocolate
Small handful toasted flaked almonds
 
Method
1. Start by whisking the egg whites in an electric mixer with a pinch of salt. When they form soft peaks, add in the sugar a tablespoon at a time with the mixer running. When you have a firm, glossy meringue, stop mixing.
2. Spread the meringue out in a large circle on some baking paper. I did this freehand and just got it as circular as I could but if you're not too good at it draw around a plate on the reverse of the baking paper to give you a guide.
3. Bake at 140 degrees Celsius for 45 mins to an hour until firm and then turn the oven down to about 80 and leave it in there for about another hour to cook through. I didn't make it so it was hard all the way through as I like a really soft meringue. It's really up to you how long you cook it for if you want it firm or gooey and fluffy.
 
Leave the meringue to cool completely in the oven with the door shut. I made mine the day before and just left it in the oven overnight.
 
For the chocolate and chestnut cream, whip the cream with an electric mixer until soft peaks are formed. You don't want it too firm as you'll find it difficult to mix everything together and it won't be as soft. The chocolate will firm up the mix when it sets anyway so don't worry about it being soft. You want the cream to hold its shape but without being stiff.
When the cream is softly whipped, fold in the chestnut puree. I did this in two batches to fold it in without knocking too much air out.
Melt the chocolate in a bowl over a pan of simmering water. You want to leave it to cool slightly before mixing it through the cream.
When slightly cooled, fold in most of the chocolate, leaving some in the bowl to drizzle on top later.
Taste the cream and add sifted cing sugar to taste if it needs it. Remember the meringue will be sweet so don't overdo the sugar!
Spread the cream over the cooled meringue, top with the almonds and drizzle with the remaining chocolate.


Tips
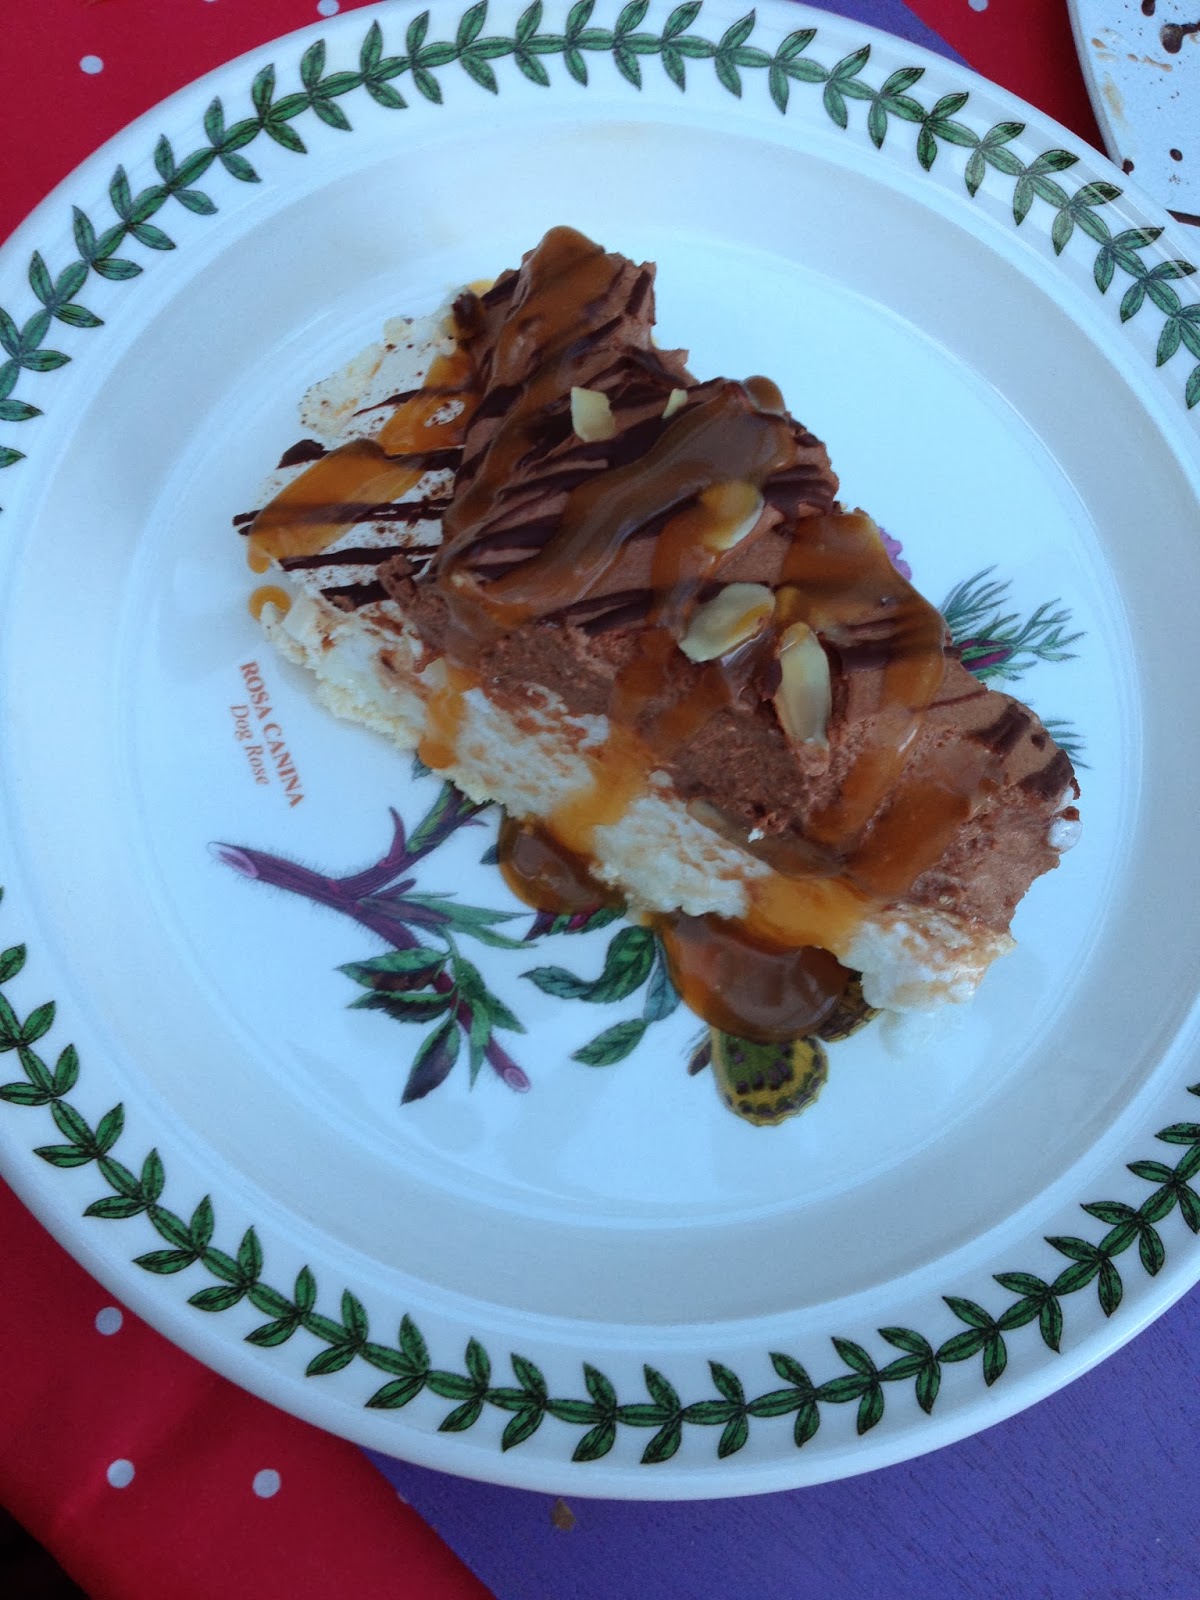
I served it with a salted butterscotch sauce which went really well considering I didn't add icing sugar to the cream. It really offset the bitterness of the chocolate. Everyone else seemed to enjoy the 'darkness' of the chocolate but I found it a bit too overpowering so added some milk chocolate to the recipe too.
Make the meringue a day ahead and leave airtight to save time. It makes it a really quick, simple dessert to assemble if all you have to do is make the chestnut cream!
Dust the meringue with cocoa powder if you want to decorate it a bit before you add the chocolate cream. If you couldn't tell before I tend to overdo the chocolate content...
Toast the almonds in a dry pan over a low heat. It's really easy to burn them so keep an eye on them!
Stick the baking paper to the tray with blobs of the meringue.. it stops the paper flying up and sticking to the meringue if you have a powerful fan!


Monday, 1 July 2013

Chocolate Peanut Butter and Marshmallow Fluff Cupcakes (Chocolate Fluffernutters)

My little brother is currently going through a phase where he's eating a LOT of peanut butter. I wanted an excuse to use my blowtorch so decided to make these cupcakes as something a bit different. 
I started off with a chocolate cake, dolloped crunchy peanut butter into the batter before baking and topped it with some homemade marshmallow fluff.


For the chocolate batter, I used the vanilla recipe but substituted 20g of the flour for cocoa powder. It's really simple to do and gives a good result. 
In a bowl I mixed 40g margarine, 140g caster sugar, 100g self-raising flour, 20g cocoa powder and mixed until it resembled fine breadcrumbs. 
I then mixed an egg with 120ml of milk in a bowl and added half of the mixture to the 'breadcrumb' mixture. 
Once combined, add the rest of the eggs and milk and mix until smooth. 
Spoon the mixture into 12 cupcake cases and add a teaspoon of peanut butter to each cake case.
Bake for about 16-18 minutes at 160 degrees Celsius. 
Allow to cool completely. 

To make the marshmallow creme you need:
2/3rds cup water
1 1/2 cups sugar (plus 2tbsp caster sugar)
3 egg whites
Pinch salt

Method:
1. Put the water and the 1 1/2 cups sugar in a heavy based saucepan. Bring to the boil and boil to 240 degrees Farenheit while you get on with the egg whites.

2. Whisk the egg whites with a pinch of salt until they form soft peaks then add in the 2 tbsp of caster sugar. 
3. When the sugar reaches 240 degrees, slowly add the sugar to the egg whites in a continuous stream while the mixer is still running. This is easiest in a freestanding mixer like a KitchenAid but works fine with a handheld one.
4. Continue to whisk the mixture on high speed for about 6-8 minutes until really thick and glossy and it resembles marshmallow fluff. It'll go really thick and 'gloopy'.


To put the cupcakes together, fill up a piping back with the marshmallow creme (or if you don't have one use a sandwich bag as I did as I don't have a piping bag at my parents' house) and pipe onto the cakes in a swirl. 

Next, toast your marshmallow lightly with a blowtorch. It's not imperative and it's perfectly fine un-toasted but I love the finish it gives and using the blowtorch.


I topped my cakes with half of a Reese's peanut butter cup and a chocolate covered peanut but you really could use whatever you wanted.

It's a simple recipe and a messy cake to eat. Prepare for a white face as the marshmallow goes everywhere!


This marshmallow creme is also good on top of s'mores cupcakes (or basically anything). I love it!!


Sunday, 30 June 2013

Super Simple Chocolate Mousse

A dessert with only 4 ingredients (one being a pinch of salt!) is DEFINITELY a winner in my book. It takes about 30 minutes to make; 5 of which is actually making, the rest is time in the fridge so requires no effort. A 5 minute job with hardly any dishes sounds like the perfect dessert for me!! It's really good just to make in ramekins for the family or you could serve it in Martini glasses with a curl of orange zest if you wanted to give it a bit more refinement.
 
You'll need:
6 egg whites
2 tbsp. caster sugar
150g dark chocolate
1 pinch salt
 
Method:
1. Melt the chocolate in a bain marie or in the microwave. Allow to cool while you start with the egg whites.
 
2. Whisk the egg whites until they start to form soft peaks and slowly add the sugar. Whisk until they're firm but not stiff peaks.
 
3. Add 1/3rd of the whites into the chocolate to loosen it and fold through.
 
4. Add the chocolate to the remaining whites and fold the mixtures together.
 
 
5. Pour the mousse into your serving dishes and chill for 30 minutes (or longer, they won't 'over-chill' so can be done well in advance).
When they're set (or before if you're really impatient like me), tuck in!!
 
They're super simple to make and can be 'jazzed up' with some orange zest or fresh berries. It's a really good and simple recipe to work from.
 
As long as you don't knock the air out of the egg whites, you can't go wrong! Be gentle with it and you'll have a lovely light, fluffy and delicate mousse :)
 
With the leftover egg yolks, try making custard!

Friday, 28 June 2013

Better than brownies... Cheesecake brownies!!

Okay, so I looooove cheesecake. The one thing I possibly love more is cheesecake baked into cake. For some reason it's just heaven for me.  Cheesecake frosting is also a front-runner in the list of my favourite things to eat. Anyway, the brownie recipe that I posted is awesome in itself, but I've found that a way to make it even better (in my opinion) is to turn it into a cheesecake brownie.
The brownie recipe is exactly the same as the one I posted before (http://bronnibakes.blogspot.co.uk/2013/06/bronni-bakes-brownies.html) but I just mix a baked cheesecake filling through the brownie batter.
The cheesecake mixture is basically the same as the first recipe in the cheesecake frosting page which is just a 200g tub of full-fat cream cheese with icing sugar mixed through to taste (do it a tablespoon at a time as it really doesn't need too much. Don't make it too sweet as the brownie itself is rather sugary so you want to keep that cream cheesey tang. Once combined mix a large egg through the mixture with a fork. 
If you want to add some chocolate chips or chunks of chopped up belgian chocolate that works reeeeeally well too (this most certainly isn't a healthy recipe!!). I sometimes add white chocolate to the cream cheese and sugar mix (melted sometimes then folded through or in chunks, whatever you prefer) and mix through some fresh raspberries for a white chocolate and raspberry cheesecake brownie. I must admit it's pretty damn special. Cherries also work well in it. 
It's really versatile and you can play around with it as you want. I'm sure some grated orange zest through the cheesecake mixture would work a treat in the brownie too. Maybe chop up some chocolate orange segments and mix them through it too to reinforce the orangeyness? That would be a pretty good Christmas brownie I reckon!!

Tips
- Don't over-mix the cream cheese - it'll go runny and won't give the thick and creamy texture of a good cheesecake when it's baked through
- Try adding the cream cheese filling to cupcakes too. Just a teaspoon full in each cupcake before putting them in the oven works a treat and gives each cake a nice cheesecakey filling. If you wanted to do chocolate cheesecake cupcakes, use the vanilla batter in the link but substitute 20g of the flour for cocoa powder. 
- When adding the cheesecake to the brownie, don't mix it through thoroughly. Swirl it through leaving good 'blobs' of it still there otherwise it'll all blend into one batter and won't give the contrast you want between gooey brownie and soft, fluffy cheesecake.
-If you wanted a simple but impressive dessert at a dinner party that everyone thinks has taken considerable effort and time, make this and serve warm with some ice cream!

It really is a super simple recipe that gives gorgeous results. Give it a go and you won't regret it. It'll soon become one of your favourite things too!

Bronni Bakes Brownies!!

Okay, so I know there's a LOT of brownie recipes out there and everyone thinks they have the perfect one. If you're a fan of a dense brownie that's got the right balance of gooeyness and cakeyness, then I'm sure these would be a really good hit! It's not my FAVOURITE brownie recipe ever, as that's the one we have in work. Seriously, those brownies are TO DIE FOR, literally. That recipe is top secret and belongs to the cupcake shop I work in as it was devised by one of the bakers there. If you want to compare the brownies in this recipe to those then if you're in Scotland you're in luck as that's where Bibi's is based. If you're not lucky enough to come and taste it for yourself, I think this recipe makes a pretty good alternative. It's based on one from 'You' magazine that my mum found in March 2013. It's certainly the closest one I've found to the awesomeness that is the legendary Bibi's brownie!!
Since tasting Bibi's brownies, my mum's been in search for the next best thing so was constantly getting as many recipes as she could find until she found the best possible alternative. It's super simple and requires minimal effort but gives perfect results every time (unless you're my mother in which case they somehow seem to resemble bricks...). Hopefully I make the recipe clear enough to make it idiot-proof (it's really not a complex one at all!!).
 Ingredients
125g dark chocolate (the better the chocolate the better the brownie)
175g unsalted butter
3 large eggs
1 tsp vanilla extract
275g muscavado sugar (light or dark, the  dark one will give a 'fudgier' texture but both work well)
75g self-raising flour
1/2 teaspoon baking powder
1/2 teaspoon salt

Method
1. Melt the chocolate and butter together in a bowl over a pan of simmering water or in the microwave (be careful with it and stir it often if microwaving to prevent burning).

2. Whisk the eggs with the sugar and vanilla until frothy. 

3. Add  the chocolate mixture to the egg mixture and mix until well-combined.
4. Sift in the remaining dry ingredients and fold through.

5. Pour into a rectangular tin (about 30 cm x 20 cm although a square would work well but give deeper brownies). I usually do them flatter and in a longer tin just so the mixture goes further. They rise up so don't be alarmed if it only covers about 1cm in the bottom of your tin!! It's meant to be a very liquid batter too so don't panic that you've gone wrong!

6. Bake at 160 degrees Celsius for about 30 minutes until firm to the touch. It can still be gooey in the middle (as I like it) as it will set when it cools and give a fudgier texture to your brownie.  
7. Cool completely before slicing up then store in an airtight container for about a week (not that they'll be around for long!!)
It's really versatile too! I've added brazil or macadamia nuts, peanut butter (crunchy gives a much better result but if you're lacking some teeth for chomping power by all means go with smooth), marshmallows (although I find it best to put them on top of a warm brownie when it comes out of the oven rather than bake them into it), cherries, raspberries, white chocolate chunks... basically anything. Cheesecake brownies are also really good too!!

I hope you find these really simple to make and they go down a treat like they do when I make them. Get creative and experiment by adding things to them too like fresh fruit or nuts!


Friday, 21 June 2013

Giant Yorkie Bar Soft-Baked Cookies

Okay, so when you think cookies, Yorkie bars aren't the first thing to immediately spring to mind. However, my little brother tried them once and is now obsessed. After trawling through lots of recipes and a fair bit of tweaking, I've now got what I consider to be the perfect cookie. Soft baked cookies have always been a hit with my family, and featured heavily in our holidays to America. The Brits just don't make cookies like Americans do! However, I'm confident that this recipe will enable everyone to get their mitts on tasty, soft and gorgeously chewy cookies anywhere in the world! From this recipe I get about 8-10 large cookies.
 
 
You'll need:
2 baking sheets lined with greaseproof paper (ideally silicone paper but don't worry if you don't have it)
 
Ingredients:
250g plain, all-purpose flour
1/2 tsp bicarbonate of sofa
1/2 tsp salt
150g unsalted butter, melted
200g soft light brown muscavado sugar
100g caster sugar
2 tsps vanilla extract (NOT essence)
1 egg plus 1 egg yolk
2 Yorkie bars (or 250g chocolate chips if making chocolate chip cookies)
 
  1. Chop up your Yorkie bars into small chunks (each block into about 6 or 8 little cubes works well).
  2. Cream the sugars and butter together in a bowl then add the eggs and vanilla. Beat well until the mixture is light and really creamy.
  3. Add the flour, bicarb, salt and chocolate to the sugary butter mixture. Mix until combined but be careful not to over-mix!
  4. Using an ice cream scoop, put blobs of the cookie dough (its quite a soft mixture so don't be alarmed if you're used to really firm doughs!) onto the sheets of baking paper. Make sure you space them really far apart as the cookies will spread out a LOT! Don't flatten the balls of dough at all as they will spread out themselves. I usually get about three big balls of dough onto each baking sheet - don't worry if you have to do a few batches!
  5. Bake the cookies for around 10-12 minutes at 170 degrees Celsius. If you want really soft cookies, go for a minimal amount of time, possibly even as little as 8 minutes. You want the edges to be slightly golden but the cookies will still be very soft - they harden as they cool. I leave mine in for about 10 minutes and they're the perfect ratio of crunchy round the edge and gooey and heavenly soft in the middle.
  6. Leave the cookies to cool mostly on their trays before placing on a wire rack to cool completely.
 
Obviously, if you want to eat them hot out of the oven, feel free! I know how great the temptation is once you smell them baking! They'd be really good drizzled with a chocolate or butterscotch sauce with oodles of vanilla ice cream as a really simple dessert at a dinner party or something. They're super simple but really impressive and tasty.
 
Tips
Don't be tempted to wait until they're firm to the touch in the oven as you'll get a really crunchy cookie once it's cooled
Wait til they're firm and mostly cool before trying to move them or they'll snap and broken cookies are sad cookies
Try them with lots of other chocolate bars! Cookies are so versatile and this recipe is a really good base. I LOVE white chocolate and macadamia nut cookies. You can always throw in a few cranberries too if you want to add something 'healthy' to justify eating more than one, but let's face it, once you try them you won't need any justification at all to go back for seconds!
Invite some friends around so that they arrive when the cookies are just in the oven, the house will smell amazing and they'll think you're an absolute genius!!
Be happy - happy bakers make happy cookies!
 
I seriously hope you try out this recipe. It's so simple! You'll never want store-bought again!!