Showing posts with label caramel. Show all posts

Wednesday, 8 January 2014

Chocolate and Chestnut Meringue

I made this instead of traditional Christmas desserts this year. I know it can be considered blasphemous but I don't really care. I'm not a massive fan of raisins so Christmas cake and pudding really do nothing for me. I'd never tried chestnuts before and Waitrose had tins of chestnut puree on offer so I decided to get one and try something with it. I think they're an acquired taste despite not being too flavourful and overpowering but with the addition of chocolate went down very well indeed!
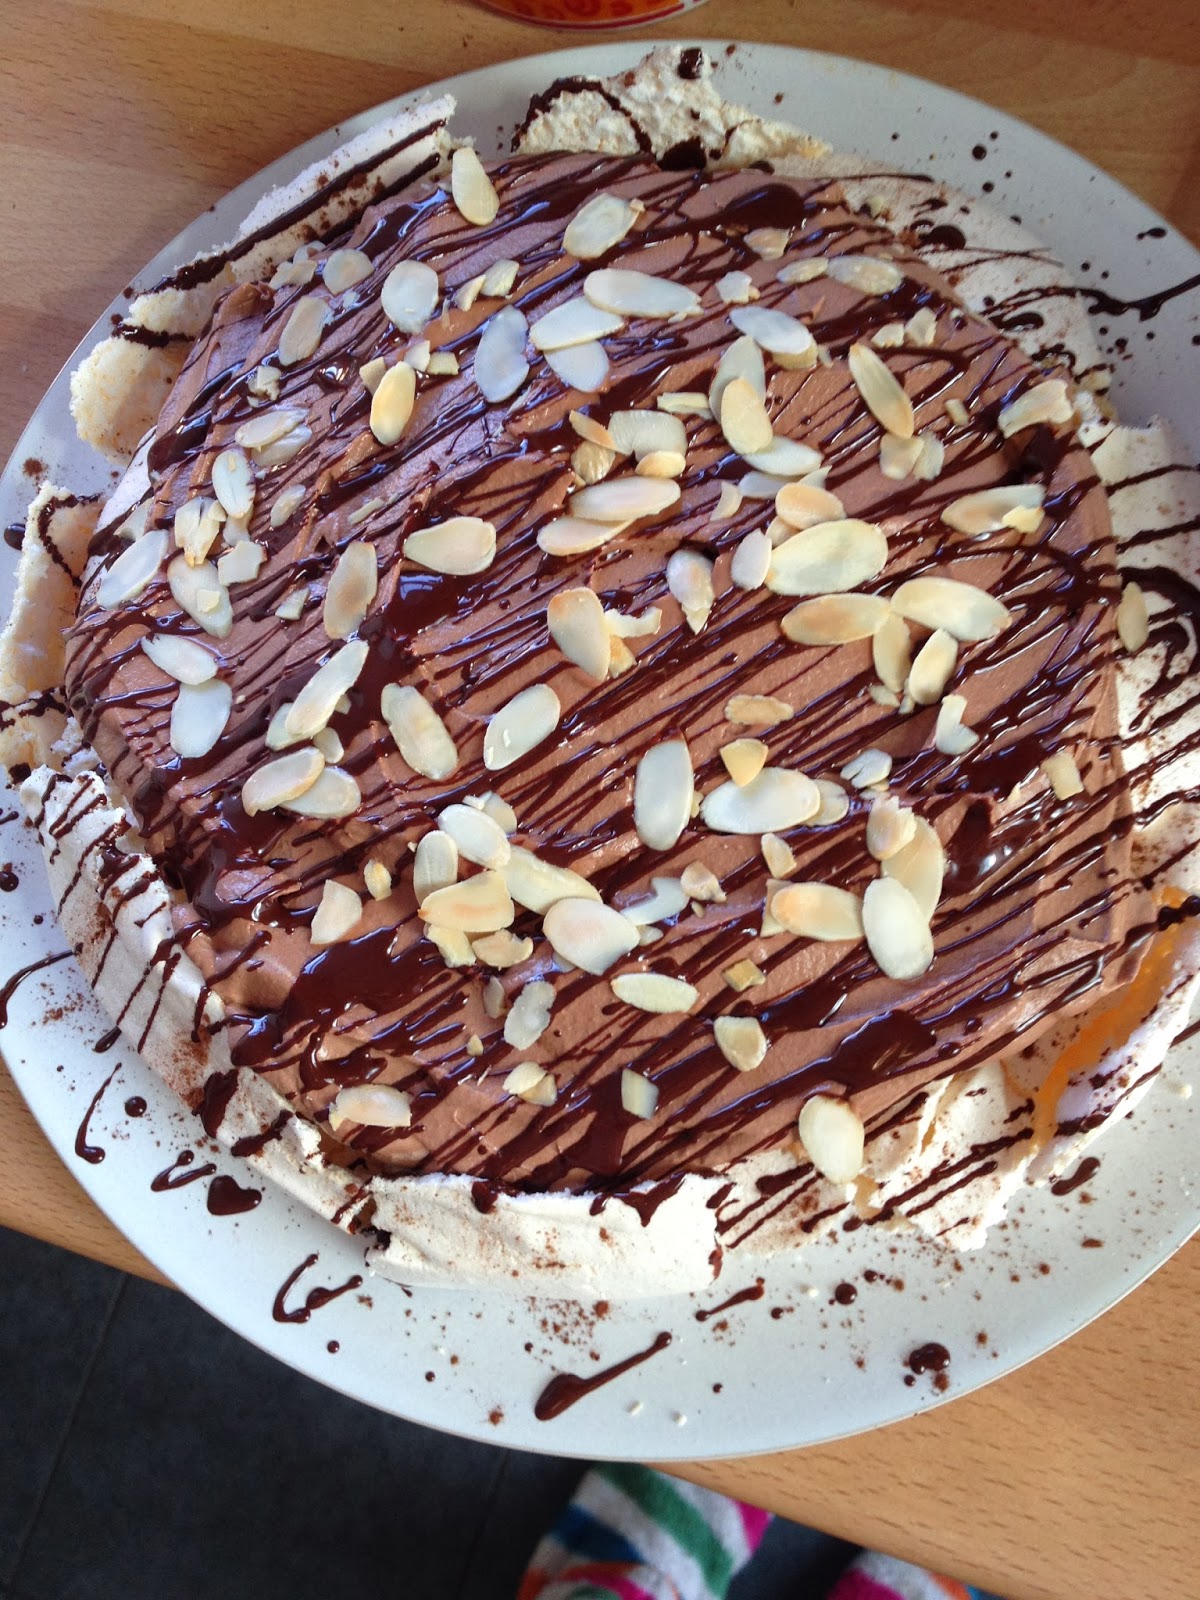
This is the finished result. Not bad for a bit of experimentation eh?! It's a simple meringue base with a chocolate and chestnut cream, topped with toasted almonds and drizzled with chocolate. I can't remember exact quantities as to be honest, I didn't measure anything! It was all just a bit of judgement and chucking a few things together and seeing what happened.
 
Ingredients
6 egg whites
350g caster sugar
Pinch of salt
 
1/2 tin chestnut puree
Large tub of double cream
Icing sugar to taste (a few tbsp)
200g good quality dark chocolate
100g good quality milk chocolate
Small handful toasted flaked almonds
 
Method
1. Start by whisking the egg whites in an electric mixer with a pinch of salt. When they form soft peaks, add in the sugar a tablespoon at a time with the mixer running. When you have a firm, glossy meringue, stop mixing.
2. Spread the meringue out in a large circle on some baking paper. I did this freehand and just got it as circular as I could but if you're not too good at it draw around a plate on the reverse of the baking paper to give you a guide.
3. Bake at 140 degrees Celsius for 45 mins to an hour until firm and then turn the oven down to about 80 and leave it in there for about another hour to cook through. I didn't make it so it was hard all the way through as I like a really soft meringue. It's really up to you how long you cook it for if you want it firm or gooey and fluffy.
 
Leave the meringue to cool completely in the oven with the door shut. I made mine the day before and just left it in the oven overnight.
 
For the chocolate and chestnut cream, whip the cream with an electric mixer until soft peaks are formed. You don't want it too firm as you'll find it difficult to mix everything together and it won't be as soft. The chocolate will firm up the mix when it sets anyway so don't worry about it being soft. You want the cream to hold its shape but without being stiff.
When the cream is softly whipped, fold in the chestnut puree. I did this in two batches to fold it in without knocking too much air out.
Melt the chocolate in a bowl over a pan of simmering water. You want to leave it to cool slightly before mixing it through the cream.
When slightly cooled, fold in most of the chocolate, leaving some in the bowl to drizzle on top later.
Taste the cream and add sifted cing sugar to taste if it needs it. Remember the meringue will be sweet so don't overdo the sugar!
Spread the cream over the cooled meringue, top with the almonds and drizzle with the remaining chocolate.


 
Tips
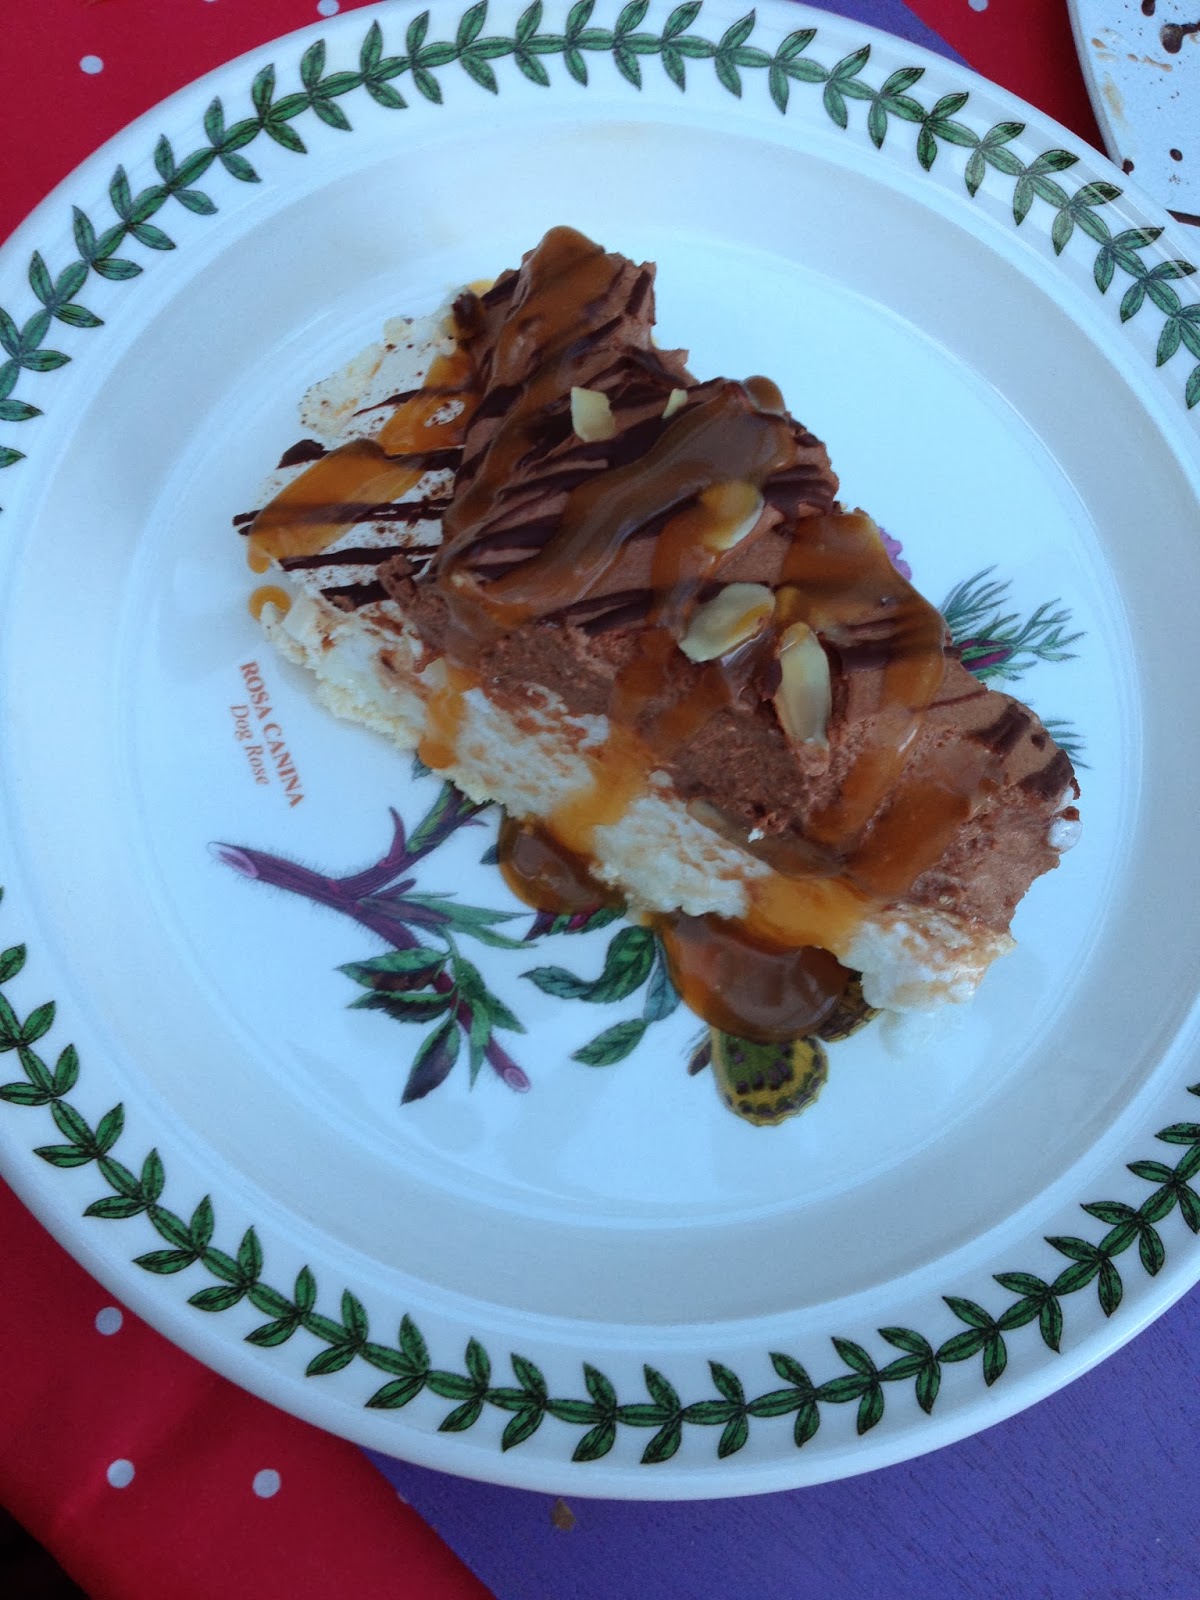
I served it with a salted butterscotch sauce which went really well considering I didn't add icing sugar to the cream. It really offset the bitterness of the chocolate. Everyone else seemed to enjoy the 'darkness' of the chocolate but I found it a bit too overpowering so added some milk chocolate to the recipe too.
Make the meringue a day ahead and leave airtight to save time. It makes it a really quick, simple dessert to assemble if all you have to do is make the chestnut cream!
Dust the meringue with cocoa powder if you want to decorate it a bit before you add the chocolate cream. If you couldn't tell before I tend to overdo the chocolate content...
Toast the almonds in a dry pan over a low heat. It's really easy to burn them so keep an eye on them!
Stick the baking paper to the tray with blobs of the meringue.. it stops the paper flying up and sticking to the meringue if you have a powerful fan!


Sunday, 30 June 2013

Salted Caramel, Cinnamon and Apple Tart

I went away to West Wales for the weekend with my mum and came back to the house to find cream, apples and a block of puff pastry that needed to be used up. Instantly I thought of caramel and cinnamon and came up with this super simple tart. It's soooooo yummy. It was just a kind of 'bung it all together and hope for the best' kind of experiment but I really like it.
 
First of all I made a salted caramel sauce. I've used this recipe numerous times and it's always come out perfectly. I'd definitely do this bit first or a while in advance. It keeps really well in sterilised jars but really isn't that time consuming to make when you need it. For a tart this size I used a whole batch.
 
The other ingredients you need are:
2 eating apples, cored and sliced thinly
1 block of ready-made puff pastry (unless you have ages to spare to make your own, shop bought is perfect)
1 tsp ground cinnamon
2 tbsp. caster sugar.
 
Method:
1. Preheat your oven to 220 degrees Celsius.
2. Roll out your puff pastry to about 1/2 a centimetre thick (or however big your tray is, mine was about 30cm x 20cm in a rectangle).
3. Stab the pastry with a fork, leaving about an inch around the edge as a border. This should stop the middle puffing up too much but give you a nice light edge to the pastry. Bake for about 10-12 minutes until golden and puffed up. When you take it out turn the oven down to 160 degrees.
4. When the pastry is golden, take it out of the oven and spread over your salted caramel, leaving about an inch around the edge.
If your pastry has puffed up in the middle too much, feel free to keep stabbing it (I did as I liked jabbing it with the fork) but don't worry too much as the caramel will flatten it down.
5. Once you've got your pastry all covered in caramel, lay your apple down in rows.
6. Mix your caster sugar and cinnamon together and sprinkle over the apple.
7. Put the tart back into the oven (remember its at 160 degrees now) for about 10-15 minutes until the apple is slightly brown and the cinnamon sugar is melted and caramelised.
When it comes out it should look like this:
 
Sprinkle with some icing sugar and allow to cool slightly (the caramel will firm up if you leave it to stand for about 5 minutes) and serve it up. It's also really good cold!
 
Tips
*Serve with ice cream or custard (I made custard the old fashioned way to go with this as I had egg yolks left after making a mousse)
*Don't worry if your caramel looks runny when going on. If you make it in advance and allow it to cool it should be a spreadable consistency for topping the pastry and it'll firm up as it cools after baking.
*If you reeeeeally love cinnamon then when the pastry comes out of the oven after being in the first time, sprinkle on some cinnamon sugar then too before adding the caramel. I did and it was yummy!!
*For a more refined and less rustic tart, try serving the caramel in little jugs, baking apple wedges in cinnamon sugar by themselves (just on a baking tray and sprinkled with sugar until softened) and making your pastry really thin and cutting into small rectangles. Sandwich baked apple between the cooled pastry rectangles and build it up kind of mille-feulle styley. You can drizzle over the caramel just before serving to stop the pastry from going soggy. I've not tried this but it should definitely work. I'll give it a go sometime but if anyone tries it this way, fire a picture over!! :)
 
I served it with the homemade custard (it's quite pale so blends in with the plate) but vanilla ice cream or some yoghurt would work really well too. Obviously there's absolutely nothing wrong eating it by itself! Also, if you want a bigger chunk there's nothing wrong at all with that. I went for a modest serving as I'd just eaten a chocolate mousse I'd made beforehand and been dunking biscuits in caramel as I was getting on with the tart and had caramel cooling... Oops!!
 
It's super simple and has hardly any work or ingredients involved and looks like it's a real labour of love. Give it a go! :)


Friday, 28 June 2013

Salted Caramel Sauce

Okay, I know this recipe isn't technically baking, but I think the fact that it goes with baked goods (such as the tastiest sauce ever to drizzle over warm chocolate brownies with a big blob of vanilla ice cream) totally justifies it being in here!
It's a really simple recipe with only 4 ingredients and although it requires a bit of concentration to make it, you'll be really proud of yourself once you've done it!!

Ingredients
175g caster sugar
3 tablespoons water
125 ml double cream
1/2 - 1 tsp salt flakes (depending on how salty you want it)

Method
1. Gently heat the sugar and water in a heavy-based saucepan over a low heat until the sugar dissolves. Once the sugar has dissolved, stop stirring!
2. Turn the heat up and boil the mixture - don't stir it or the sugar will crystallize!!
3. When the colour changes to a rich gold, remove the pan from the heat. If you're getting parts of the pan cooking the sugar faster than others then swirl the pan to get an even distribution of sugar and heat but don't be tempted to stir it!
 
4. Once you have your golden caramel, remove from the heat immediately (it'll carry on cooking and go from golden to burned in no time unless you're really careful - this is the hardest bit!), and add in the cream and salt. It'll bubble up but this is totally normal because your caramel is so hot. Stir the pan until the caramel is smooth and thick. When you've got your caramel texture, set the pan aside to cool.
I couldn't get a picture of mixing the cream and salt in as the steam blocked up the camera on my phone but persevere, don't be scared and just keep stirring!!

This stores really well in a sterilised jar and is a really versatile sauce. It's really handy to have a jar in the fridge to dunk biscuits into if you've had a day that's really sucked... it's a guaranteed pick-me-up! I think sugar fixes everything and this recipe is definitely one that can make most things better!

Tips
- Try serving with ice cream to create a super simple dessert.
- Don't be scared to try it - if you cook the sugar too much you've only lost sugar and a bit of water. If you think you may have burnt it don't just add the cream and hope for the best or you'll get a bitter tasting caramel that really doesn't taste too good. You're better off starting again, learning from the mistake and being even more careful to make sure you get your salted caramel perfect. 
- Try adding it to the top of a Nutella pizza (I'll post a recipe to that when I get round to making it) to give it a bit more 'oomph' (not that it needs it). Definitely not something for the faint-hearted! Probably enough calories in that to last you a week but once you try it you really won't care!!

This recipe makes about half of a jar full so if you wanted to double up the quantities to make a full jar to give it as a cute homemade gift that'd be perfectly fine :) It also stores well in the fridge, just let it come to room temperature before serving.
(As you can see by the time I'd got round to photograph it, half the jar had 'mysteriously' disappeared..)