Showing posts with label cake. Show all posts

Tuesday, 6 May 2014

Simple Genoese Sponge

While deciding what sponge to use as the base of a birthday cake, I did a bit of experimentation. I've never made a Genoese sponge before so decided to give it a go. Overall it was quite simple and the cake was light and really spongy. It's not dense enough to support the weight of the fondant I'd need to cover it with for my birthday cake but it makes a really nice light sponge for making a cake for afternoon tea or something. I topped it with lemon curd and fresh blueberries but you really could use anything. There's only one of the two layers in the photos because half of it was eaten warm from the oven with Nutella and custard. That's less sophisticated but so so tasty! 


Ingredients
50g melted, cooled butter
120g plain flour
Pinch salt
4 eggs (if you can, use duck eggs or substitute one in for a hens egg)
120g caster sugar 

Method
1. With a little of the melted butter, grease two sandwich tins.
2. In a bowl over hot water, whisk the eggs and sugar with an electric whisk for about 10 minutes until thick, pale and creamy and at least tripled in size.

3. Remove from the heat and fold in the flour in two batches, followed by the butter. 

4. Divide between the two tins and bake for 20-30 minutes at 170 degrees Celsius until golden and a skewer inserted into the middle comes out clean. 

To finish top with lemon curd and fresh blueberries and then dust with icing sugar. I did take a picture but it seems to have vanished from my phone while all the rest have stayed... mystery! It's really versatile so you really could top it with whatever you wanted. My brother wanted a Nutella one so instead of having two layers of sponge I had one of the cakes topped with lemon curd and blueberries and the other with Nutella and fresh strawberries. Give it a go! 

Tips
-Use a much bigger bowl than you think you need for the eggs and sugar- you'll be surprised how much the mixture expands! 
-Don't be impatient with the whisking - it'll go really thick and creamy and leave a trail when you pull the beaters out of the mixture. 

Thursday, 27 June 2013

Pumpkin Gingerbread Cake

I found a recipe online for pumpkin gingerbread and was really intrigued. We had some canned pumpkin at home so I decided to give it a go. My mum's really keen on pumpkin and anything with spices in it so while I was visiting my parents I thought it would be a good time to try it out to make sure it'd get eaten! I must admit, it didn't really appeal to me at first but once I'd tried it I was convinced. I added more spice to the recipe than it initially said and drizzled the finished cake with some icing just to give it a sweet edge rather than being somewhere in between sweet and savoury (not that it needed it as it's definitely more cake-y than bread-y but I liked it with the extra sweetness). Anyway, even if you're not a massive pumpkin fan I'd still give this cake a go. It doesn't overpower the cake at all, just gives it a really nice moistness and subtle earthy flavour. I'm sure you'll be convinced as I was!!
 
 
These quantities make a regular loaf tin sized cake. I'm sure if you wanted to do it in smaller tins to make individual cakes that would work really well or in a big square to slice it up into little cubes. I like the convenience and less 'pretentious' loaf tin for this simple cake though.
 
Ingredients
1 1/2 cups caster sugar
1/2 cup vegetable oil
2 eggs
1/3 cup cold water
1/2 can pumpkin puree
1tsp ground ginger
1/2 tsp ground mixed spice
1 tsp ground cinnamon
1/2 tsp ground cloves
1 3/4 cups plain flour
1 1/4 tsp baking powder
3/4 tsp salt
 
Method
1. Preheat your oven to 170 degrees Celsius. Grease your loaf tin with butter or line it with a paper insert (I use some paper liners which are super convenient and really inexpensive from Lakeland http://www.lakeland.co.uk/5553/2lb-Loaf-Tin-Liners )
 
2. Mix your sugar, oil and eggs together until smooth then beat in the water. When it's smooth and frothy, add in the pumpkin and spices and mix well.

 
3. Sift the remaining dry ingredients into a bowl then add the dry ingredients to the wet ones and fold through until incorporated. Don't over-mix it.
4. Pour your batter into your lined tin.

 
5. Once your tin is full, place it in the oven for about an hour. Mine took about an hour and 20 minutes but check it after an hour to see if a skewer comes out clean.

 
When it's done, the cake will be risen and golden. I thought it looked a bit bland and wanted to jazz it up a bit....
 
 
So I made a really simple icing just by adding water to icing sugar a little at a time to make a thick paste. I then piped it over the cake in a giant zig-zag and let it set before slicing it up and serving.
 
 
Like I said, even if you wouldn't consider yourself a pumpkin fan or don't like the idea of pumpkin in cake, try it! It may sound a bit strange but it's popular for a reason. I think this would go down a treat in the cold winter months with a nice big mug of tea or hot chocolate but even in summer it's a really nice tea bread or alternative to other cakes. It's dense yet moist and has a unique earthy and subtley spicy flavour. I actually quite like it (and that surprised me!).
 
If anyone does give it a go I'd love to think what you thought of it! There don't seem to be many recipes around so I'm not sure if that's because it's just not popular or because the cake goes by a different name. I'm sure any pumpkin cake has spice in it but I really like the balance in this one without it being too overpowering. I'm not sure what else I can say to convince you other than you'll be pleasantly surprised.
 
Also, I know in the UK canned pumpkin can be hard to come by but while shopping in Waitrose last week I saw they'd started to stock it. I'm sure ASDA would sell it too as they're quite good on stocking American products over here (for obvious reasons). I really think canned pumpkin is underrated in the UK... I'm definitely a convert and intend using it much more now!! 


Saturday, 22 June 2013

The Best Lemon Drizzle Cake EVER!

Okay, so I'm not the biggest fan of lemon cakes. I can take or leave them unlike most other cakes. This one however, is a hit with everyone. It reminds me of my childhood and standing on a stool in the kitchen with a wooden spoon with my mother and making it the old fashioned way. I still make this on a regular basis and its definitely a hit with the whole family.
The recipe came originally from a lady called Margaret who my parents met in the SCBU facility in the hospital I was born in. I was in the neonatal unit for a short while and it was there that my mum befriended Margaret, grandmother to another baby there (who I think was called Joshua). She made this cake one day and then gave my mum the recipe after it was such a hit. Every time I make it I think of the emotional turmoil it must've helped my parents through, and have therefore dubbed it the all-healing, miracle lemon cake. If you make it you'll realise that it's not an exaggeration; it really is pretty special!!
 
I usually make this in a 2lb loaf tin but have also tried making cupcakes with it which also went down a treat!


It's a really simple method too:
  1. In a bowl cream 110g butter (or Stork) and 110g sugar together until light and fluffy.
  2. Beat 2 eggs in a bowl and weigh out 175g of self-raising flour.
  3. Add the flour and beaten eggs alternately until you've incorporated both.
  4. Add in the zest of a lemon and mix through.
  5. Pour the mixture (it's quite thick so don't be alarmed) into a 2lb loaf tin and bake  at 180 degrees Celsius for 30-40 minutes until a skewer comes out clean. If you're making cupcakes they obviously won't take that long, I'd try them for about 18 minutes then keep checking. I'd also recommend turning the oven temperature down to around 160.
 
While the cake is in the oven, combine the juice of the lemon with 4 tbsp. of  icing sugar and mix until smooth. It's a VERY runny icing so don't be tempted to add more icing sugar!
When the cake comes out of the oven, allow to cool for a few minutes then while it is still hot pierce several holes in the top of it using a skewer. Pour the icing over and allow it to soak into the cake.
Allow the cake to cool in the tin.
When cool, slice it up into generous slices and enjoy a moist lemon cake with a perfect balance of sharp and sweet.
 
I've also made this cake and added fresh lemon curd into the middle of the batter before baking which works a treat. If not everyone's a fan of lemon curd, you could always spread some on after it's been baked and sliced (any maybe add some clotted cream if you're feeling really naughty!).
 
It's definitely a favourite in our family so I hope you enjoy it just as much!


Cute Sheep Cupcakes

I first saw the idea for sheep cupcakes on a Facebook post from a bakery that I follow. I then decided to give it a go for myself. They're so SO simple but look really cute and seem to be really popular!
You don't need many ingredients at all. I just used the recipes that I've previously posted for vanilla cupcake batter and buttercream and used that as my starting point.
I piped a big swirl with an open nozzle (the one with the big hole in it) and kept it quite flat rather than building it up to a peak. I then just covered it in mini white marshmallows and that's your sheep mostly done! The face was made from black and white fondant icings and just secured in place with a blob of buttercream. It's really that simple!
This one is relaxing on a little patch of grass which is a big crunchy cookie covered in green buttercream. I used a 'grass' nozzle to get the grass effect but I'm sure it'd look great even if it was just spread on flat!
 
 
I hope you give these a go to see how easy they can be! They don't need to be vanilla flavoured either! Try making a chocolate base (substituting 20g of flour for 20g cocoa powder in the original recipe) or with white chocolate buttercream. The list of potential variations is endless so get creative! I want to make the base 'welsh cake' flavour as the sheep are associated with Wales. That's an experiment for another day.
 
I hope these bring a smile to your face!


Pina Colada Cupcakes

Okay, so on some summery days all you want is to sit in the sun with a yummy cocktail. One of my favourite cocktails has got to be the classic pina colada. For the days when relaxing with the genuine thing isn't possible, these cupcakes make a pretty good alternative!

I started this by using the usual vanilla cupcake recipe that I usually use. Before baking I mixed through some crushed pineapple (about 2-3 tablespoons) to make sure the sponge had a good pineappley flavour. If you don't like fruit in cupcakes then you could leave it out and rely on the icing for the pina colada flavour but I really like fresh fruit in cake and think that it helps to make it a pina colada cupcake, rather than a plain vanilla cake with interesting frosting (not that there's anything wrong with that!). If you want to add some coconut into the cake then that's fine too, although I relied on the covering of coconut on the top of it for my coconut fix. I did however add a few tablespoons of coconut rum into the sponge but again, if you wanted to leave this out there's enough desiccated coconut on the icing to give it the 'colada' feel.
While the pineapple cupcakes were in the oven baking, I set about making the icing. I made the regular vanilla buttercream that I usually do (on a previous post) and added a few tablespoons of Pineapple Sourz liqueur. You can add it to taste but I added a fair amount (probably due to being a student!) to make sure the icing was undoubtedly pineapple. I didn't colour it initially, so left it white so that I could flat ice the cupcakes when cool.
When the cakes were completely cool, I covered them in the pineapple flavoured icing so that they were flat. I usually do this by putting a large 'blob' of icing in the middle of the cake and then use a small spatula to spread it out flat from the centre out by using gentle strokes from the middle of the cake direct to the edge of the cake case. Be sure to get the icing into all the ridges of your cupcake case!
Once the icing was flat on the cakes (don't be too fussy about it, it doesn't need to be perfect because you'll be covering it up anyway), put some desiccated coconut into a shallow dish. Put each cake into the coconut 'head first' so that the coconut sticks to the buttercream. Gently swirl the cakes into it if necessary to make sure that they get a good coconutty covering.
Once the cakes have all been flat iced and coconut-covered, add a few drops of yellow food dye into the remaining buttercream. This isn't necessary but I love the contrast with the white coconut rather than the whole cupcake being white. Fill up a piping bag fitted with a star shaped nozzle and pipe a small swirl onto the top of each cake. I start with the piping bag on the far edge of the cupcake and pipe in an anti-clockwise swirl, narrowing with each time round to make the tip.
I had some jelly beans which came in random flavours (I think they were JellyBelly beans) and picked out the pineapple, coconut and pina colada flavoured ones to use as decorations on the top. They're not essential but I really think they finish the cupcakes off well and look really cute.

I'm sure there are plenty of variations out there of the good old pina colada cupcake but this was my experimental and 'make it up as you go along' version. I just used things that I had to hand to improvise with the recipe but I think it worked out quite well. You'll notice that there's only 9 in the photo from a batch of 12. The three that 'went missing' between finishing off with the jelly beans and taking the picture would suggest that other people thought they were a success too!!

I really hope you try this and it puts a big smile on your face as it did mine :)


Friday, 21 June 2013

Birthday Cakes

I thought I'd share some 'big' cakes that I'd made so that this cake blog has a bit of variety in it. These are all celebration cakes that I've made for people's birthdays; some from books as inspiration and some which I've thought of based on a specific theme. I really enjoy making novelty cakes like this as well as cupcakes, they just take sooo much longer to make than a batch of cupcakes. I'm such a perfectionist that I probably spend far more time making them than I should but I like to have things just so. I've not done any in a while now, the latest one of these is from before I left home to go to university so all of these were done from when I was 15 up to 18. I look at some now and think 'I could do that so much better if I re-did it' but still, I'm really happy with them. I can't wait to get back into making more novelty celebration cakes when time permits.
 
 
This cake I made for my niece. I totally forgot to take a photo of it before I gave it to her so this is one that she took just before slicing into it. I had no idea what to do as she has some crazy, wonderful and random tastes. Summing her up in a few words would be difficult so I went with variety as the theme. I wasn't sure exactly what to go for decoration-wise so thought I'd mix it up a bit to reflect her personality. I love the combination of stripes, colour blocking, polka dots, flowers and a big bow. It's the kind of cake that puts a smile on your face (I hope!). It was one of the first (if not the first) birthday cakes I made so it's simple enough to be replicated by even the most novice bakers (I managed it!).

 
This cake was one that I did for my nephew's 18th birthday. I asked my sister what he liked in order to think of some kind of theme for the cake.. she replied 'boobs'. It seemed to go down really well at the party and everyone commented on it. It was a bit of a challenge and I just made it up as I went along. Having no templates or anything for the bra proved slightly difficult as I obviously didn't anticipate quite how much fondant I'd need to cover the cake sufficiently, hence the addition of nipples to it. I never intended it to be quite so risqué but people seemed to like the cheeky aspect of it. This is still one of my favourite cakes to date. 

 
Similarly to the boob cake above, I made this cake using a pyrex bowl. As long as it's greased enough there really is no trouble turning the cake out. I used a madeira batter just because it's a bit more robust than some others and tended to support the fondant better. The little boy who I made this for loved aliens and I loved trying to create this super cute UFO cake. I found an image in a children's cake book that my mum had bought from her school fete, but don't have the book any more. It's pretty much modelled on that but with a few extra bits that I just added when I was playing around with decorations. This one never fails to make me smile :)

 
This SpongeBob cake is again, a really simple one. I know ASDA sell some similar but you can't beat homemade! It really is so simple to do! All it requires is a bit of fondant colouring and cutting out shapes. I did most of the cutting out with various sized circular objects that I had to hand (of course use cutters if you have them!) and did the mouth freehand. It probably works out cheaper to buy one but the satisfaction that you get when you look at a mass-produced cake that sells in huge quantities then look at your own and it's almost identical (if not better than the commercial one!) is immense. It's a really simple cake that goes down really well!! Who could fail to know who the star of this cake was?!

 
This cake was for a family member's 65th birthday. She loves golf so I was asked to make a golf-themed cake. I didn't set off with any plan at all, it just kind of happened - I had too much batter for my square pan so put it into a bowl and just thought 'ahh sod it, I'll bake that too'. The little figure I got from a confectionary supplies shop in Cardiff and it was just the right size for the cake. I know the scale on it is awful as there'd be no way in hell that poor woman could hit a ball that size but I just think it's a really cute cake with a very obvious theme! For the grass on the board I just covered the fondant in some dyed desiccated coconut and the bunker is just muscavado sugar. If I was making it again I'd probably hollow out the bunker just to make it a bit more realistic and less gravity-defying.

 
This cake was a gift from my next-door neighbour to her friend. We, as a family, have always been really close to this particular neighbour and she's more like family to us now. When she asked me to make a cake for someone I didn't know I was a bit worried at first in case the woman didn't like it but decided to just give it a go. Sonia, the lady whose birthday it was loved reading. I was going to try and replicate a complex book- themed cake by doing a library or something but then decided to keep it simple. I just covered a Victoria sponge in fondant, used a big kitchen knife to make indentations to resemble pages and embossed some lettering in the top which I then piped over with royal icing (as my freehand piping skills were a bit pants then!). It's a really simple idea but went down well and was a good cake to cut up easily and serve to lots of party-goers.

 
This cake was inspired by one that I'd seen in the foodhall of a big department store in London (I think it was Selfridge's). I saw this chocolate cake with marshmallows on and thought 'I can do that bigger!'... so I did. Underneath is a chocolate fudge cake with a white chocolate ganache centre. It's then covered in marshmallows using white chocolate as 'edible glue'. I poured the excess chocolate down the outside of the cake and stuck some Dr Oetker wafer flowers to it to give it a more 'celebration cake' kind of feel. I also added some edible glitter for a touch of sparkle. I had to go to the local florist and ask really nicely for some cellophane in order to transport the cake as it got a lot bigger than anticipated and I didn't have a box big enough. This is probably the simplest cake on here but one of the most visually impressive. I loved making it and the reception it got was amazing! It's also quite a cheap one to make as it's mostly shop-bought marshmallows!

 
Okay, when I said I'd made these all before I left for uni, I lied. This cake is quite a recent one from a few months back. It was for a mothers' day display in work but I just loved the spring feel it gives. I'm getting quite a lot of practice in with giant cupcakes now and am totally convinced by them. I love experimenting with different flavours and styles of piping. They're so versatile!

 
This cake was one that I made for an 18th birthday. I decided to go big with it but still keep it simple. It's a really easy cake but it's still quite 'in your face' due to the hot pink and animal print. I found the ribbon a while back in Costco and just bought it because it was so unusual. I tend to buy lots of random stuff when I find it and tell myself it'll come in handy at some point (although a lot of it ends up in the bin as it was a crazy impulse buy for something I have no use for). I used a posy pick (kind of like the top of a biro) to put into the top tier to hold the feathers as sticking wires into a cake is something I really didn't want to do for hygiene reasons. This again is a madeira cake but with chocolate, lemon and vanilla layers just to add a bit of variety. There are sparklers on the bottom tier but it's really hard to see them and we didn't manage to get a photo when they were lit as they failed and only lasted a few seconds.

 
Finally, this cake was one that I made for my 16th birthday. Since I was little I've insisted on making my own birthday cakes as then the blame lies solely on me if I don't like it. I'm incredibly fussy, hard to please and a total perfectionist so really don't envy anyone who is tasked with the job of making my birthday cake, as my mother was for the first few years of my life. As soon as I was able to help in the kitchen, it was impossible to get me out of there. When I was about 5 I discovered that sticking chocolate finger biscuits in a cake made a hedgehog and was determined to have hedgehog cakes until the novelty wore off as I got older. For my 15th birthday I made a cow print cake (white fondant covered with some black royal icing piped into 'splodges' with some fondant modelled cows sat on top munching grass) but I can't find a photo. This is the first birthday cake that I actually have a picture of. I got the inspiration from a picture I saw online and just simplified it so that I could make it relatively easily. It's a really simple idea but I love the way the cake looks in its entirety. It's super cute and I love the pastel yellow against the bright vibrant decorations. It's like summer in edible form (ironically my birthday was in January so the summer theme didn't really work...).
 
 
Hope this inspires!
 

Bacon and Maple Cream Cheese Cupcakes!!

Okay, first blog post EVER. I'm SO out of my comfort zone with computers (unlike when I'm in the kitchen and covered in flour!) but I'm going to give it a go. I thought I'd start off with something that almost everyone loves... BACON! Until recently, I was a vegetarian and the thing that made me kick the 12 year habit was bacon... Thin, crispy, salty, GORGEOUS bacon. What better way to honour this newfound love than to combine it with my other all-time favourite thing to eat... cake! I did a bit of research into bacon and maple cupcakes but quickly gave up on research and just decided to wing it and experiment with my own. Perseverance isn't one of my strengths so all I wanted to do was get stuck right in.
Okay, here you have a picture of the finished product (along with another experiment for the day in the form of a strawberry cheesecake cupcake). Considering I had to make up a batch of cream cheese frosting anyway I thought I'd use up the strawberries that I had in the kitchen. 
I decided to make a vanilla base with a favourite recipe of mine (based on one from the Hummingbird Bakery) which results in gorgeously soft and fluffy cupcakes every time (honestly, that's not an exaggeration!) and load it up with some maple bacon. All I did was cook the bacon in a dry frying pan and then add a generous glug of some maple syrup (the real stuff, not pancake syrup!!) towards the end of the cooking time so it would caramelise. I'm a real fan of super crispy bacon and really, that's what you need for this recipe. Soggy bacon in a cupcake (or any other time for that matter) just won't do! It's worth noting that once you take the bacon from the pan, avoid putting it on kitchen towel as you will end up in paper-coated bacon, which to be honest, isn't all that great!
Once you've got your sticky, crispy, gorgeous-smelling bacon cooked, let it cool then chop it up into little glossy shards. Don't be tempted to munch away at it as you make your batter!!
 
I made my regular vanilla batter next, and then divided up the bacon into the cupcake pans before cooking, reserving some for the top of the cakes when they're iced. If you're planning on making these take your butter out of the fridge so it's nice and soft for when you make your icing.
 
(Ignore the crushed biscuit on the pan, it was from the strawberry cheesecake cakes going on in the adjacent holes!)
When they're cool (or while they're cooling if you're reeeeally impatient) it's time to make your gorgeous maple cream cheese frosting!
 
I start off with a simple buttercream. That buttercream in itself is pretty damn tasty but I use it as a base for my cream cheese frosting. If you wanted to make your cream cheese frosting with just cream cheese and icing sugar, be my guest! It's worth noting that you will NOT need twice the amount of sugar to cream cheese. I'd recommend doing it a spoonful at a time and adding sugar to taste.
If you're doing a buttercream-based cream cheese frosting, take your buttercream and add in a 200g packet of cream cheese.
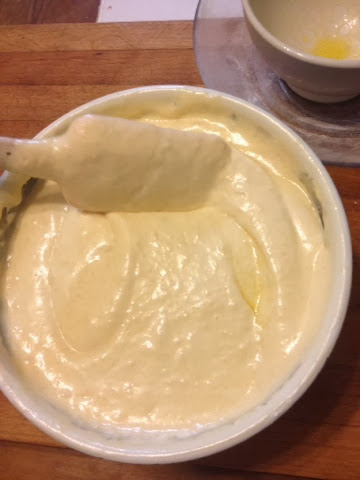
Take your cream cheese and add it into your soft and whippy buttercream along with a couple of tablespoons of maple syrup to taste (don't overdo it as you'll be drizzling some over the top of the cakes and don't want a maple overload (if such a thing is possible)). I blast it in the electric mixer to get it nice and smooth but seriously, blast it for a few seconds, not for a long time. If you over-mix it then it'll go all runny... not the best consistency to ice a cupcake with! If you're worried that you'll overdo it, by all means mix the cream cheese in by hand and it'll reduce your potential for failure.
The cream cheese frosting should be nice and thick and a good piping consistency.
 
Now you've got your cooled cupcakes and your frosting made, it's time to ice those babies!! By all means just get a spatula and spread on that mapley cream cheese yumminess but I like to pipe it on. That proved difficult considering I didn't have a piping bag and nozzle to hand when I made these as I was at my parents' house, but I just improvised with a food bag and snipped off the corner.
 
Ice nice big swirls onto the tops of your golden cakes and top with the reserved candied bacon from earlier (if you've already eaten it despite my prior warning not to give into temptation then that's just silly.. they really make an awesome cupcake even better!). Drizzle over a bit more maple syrup (I don't think I need to give a reason to justify this step).
 
There you have it, sweet, salty, fluffy, crunchy and heavenly smelling cupcakes. Perfect for fellow bacon fans, cupcake fans or, as my friend quickly pointed out, an AWESOME hangover cure. Who wouldn't want one of these to wake up to after a heavy night out?!
 
I hope that making these cupcakes and tasting how awesome they are makes you forgive me for the excessively long first post!!